Step-by-Step Guides
Change everyday settings in the Settings drawer
Open the Settings drawer from the NotBot panel to change the print mode, label size and winner popups, print a test label, search every setting, and see your NotBot version.
Last updated 2026-10-08 · Applies to NotBot 1.4.4+
The Settings drawer is the quick way to the settings you change most: the print mode, the label size, winner popups and a test print. It slides in over your show from the right, so you can change something without leaving the show. Every other setting is in Customize › Advanced Settings, and the drawer can take you there.
The pictures show a practice show running on the left side of the window. Your show looks like Whatnot (or the platform you sell on), but the drawer is the same.
Before you start
- You are signed in to NotBot. If not, follow Sign in to NotBot.
- To pick or change your printer, follow Connect and test your printer. It uses the same drawer.
Open the drawer
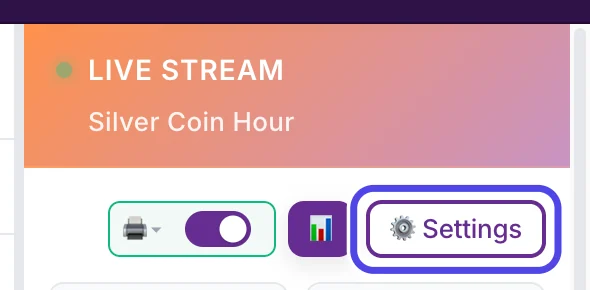
Step 1: Click Settings
In the NotBot panel on the right side of the window, click ⚙️ Settings. It is at the end of the row of controls under the show name, after the printer icon and its switch.
You can open it at any time, before a show or in the middle of one. NotBot keeps following your show while the drawer is open.
Step 2: Find your way around the drawer
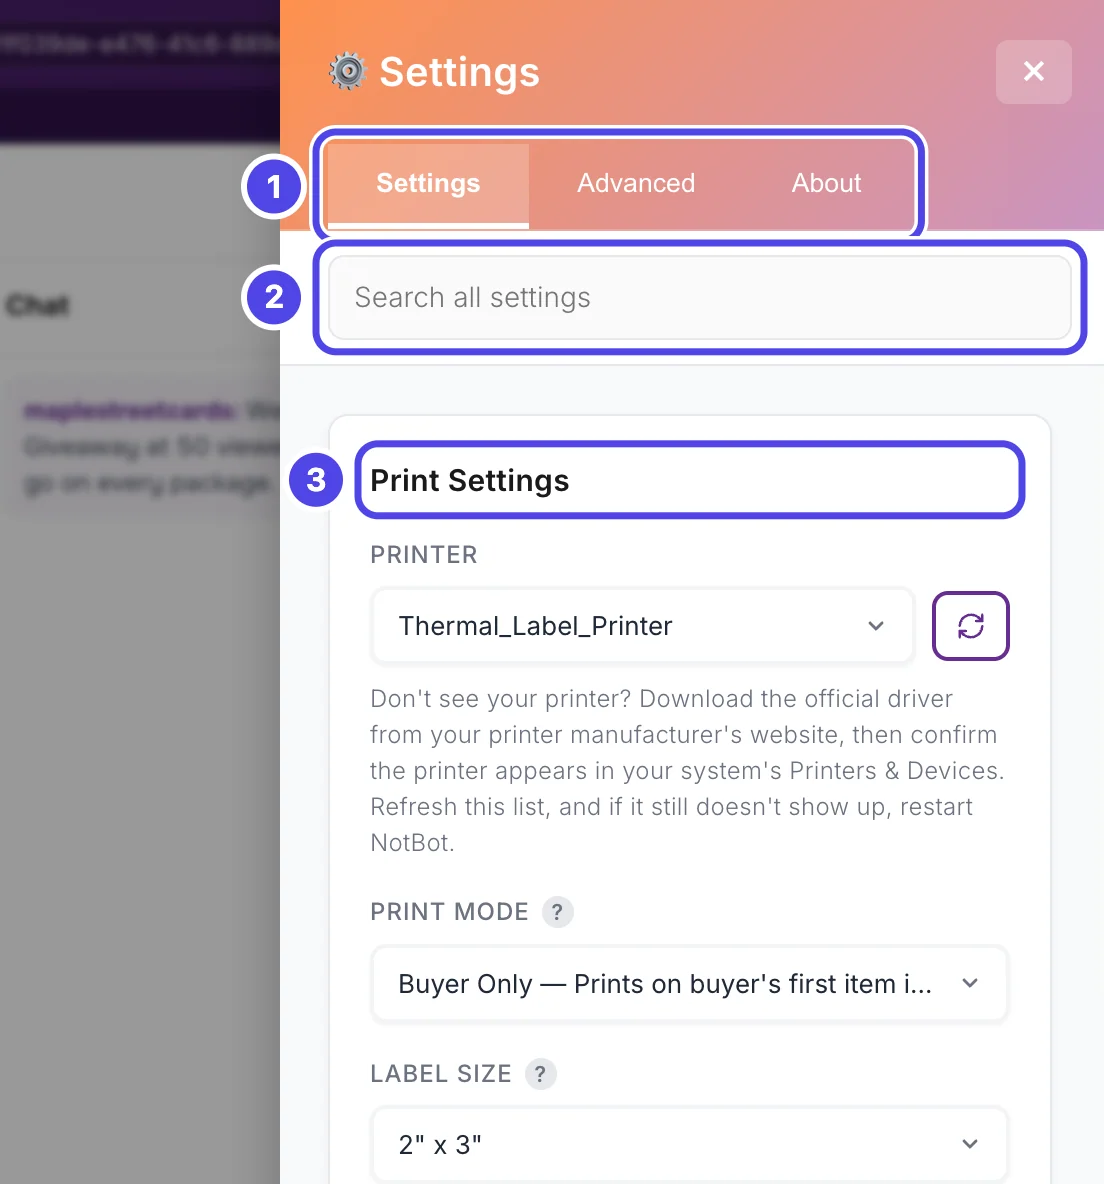
The drawer slides in from the right, over your show, and opens on the Settings tab.
- Three tabs along the orange top: Settings (the everyday settings), Advanced and About.
- Search all settings, under the tabs. It finds any NotBot setting, including the ones that are not in the drawer.
- The Settings tab, from top to bottom: the Print Settings card (Printer, Print Mode, Label Size and the label previews), the Desktop Notifications card, an Advanced settings row, and the Test Print card. Scroll down the drawer to see them all.
There is no Save button. NotBot saves each change the moment you make it.
Change how labels print
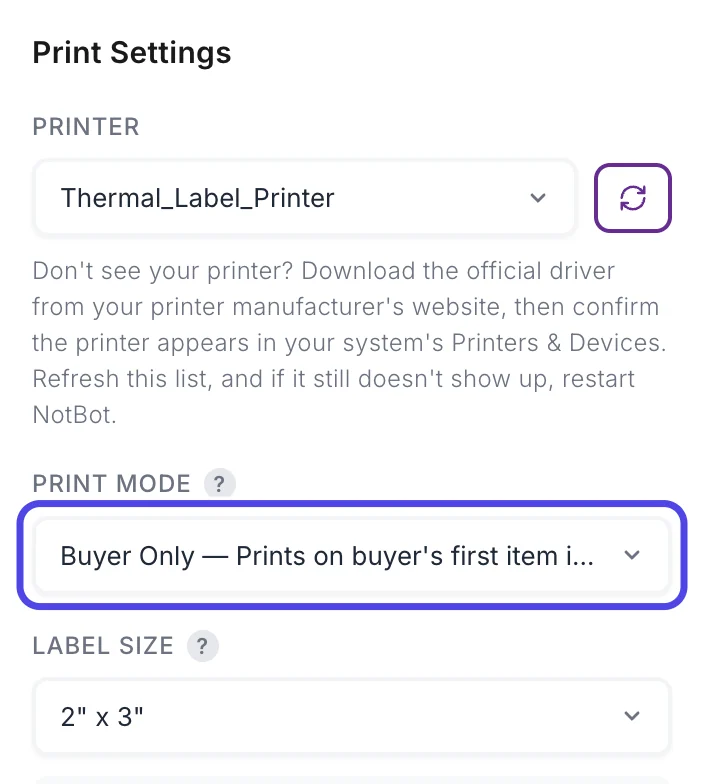
Step 3: Click the Print Mode box
In the Print Settings card, click the box under PRINT MODE. It shows the mode NotBot uses now. A new NotBot starts on Buyer Only.
Hold the pointer over the small ? next to PRINT MODE to see a one-line summary of each mode.
Step 4: Click a print mode
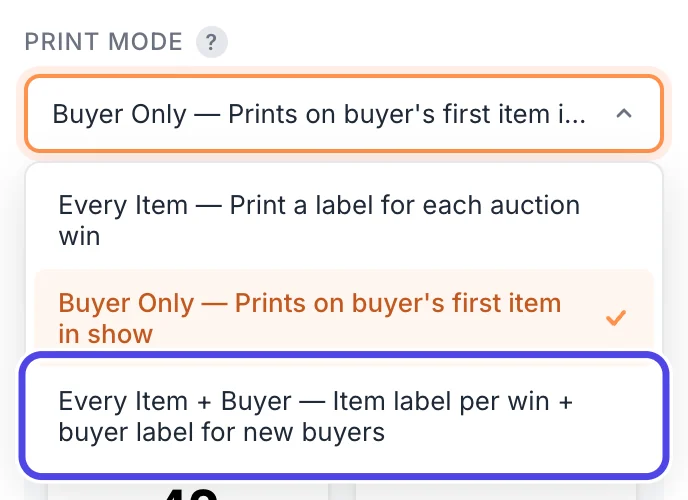
The list shows the three print modes, each with a short description after its name. The check mark is on the mode in use.
- Every Item: an item label for every sale, with no buyer numbers.
- Buyer Only: one numbered box label the first time a buyer wins in the show.
- Every Item + Buyer: an item label with the buyer's number for every sale, plus a box label for new buyers.
Click the one you want. The list closes and NotBot saves it right away. In the middle of a show, the next sale uses the new mode; labels that already printed stay as they are. Choose which labels print shows the real labels each mode prints.
Here we click Every Item + Buyer (circled).
Step 5: Pick your label size
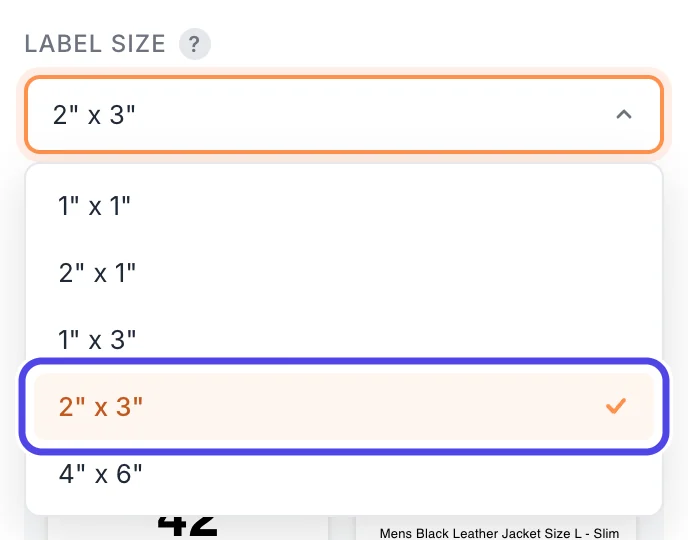
Click the box under LABEL SIZE, then click the size printed on your label roll: 1" x 1", 2" x 1", 1" x 3", 2" x 3" (the size NotBot starts with) or 4" x 6". The check mark shows the size in use.
The next label prints at the new size. If you are not sure which size you have, Connect and test your printer shows how to read it off the roll and what each size looks like.
Step 6: Check the label previews
Under LABEL SIZE, the drawer changes with your choices:
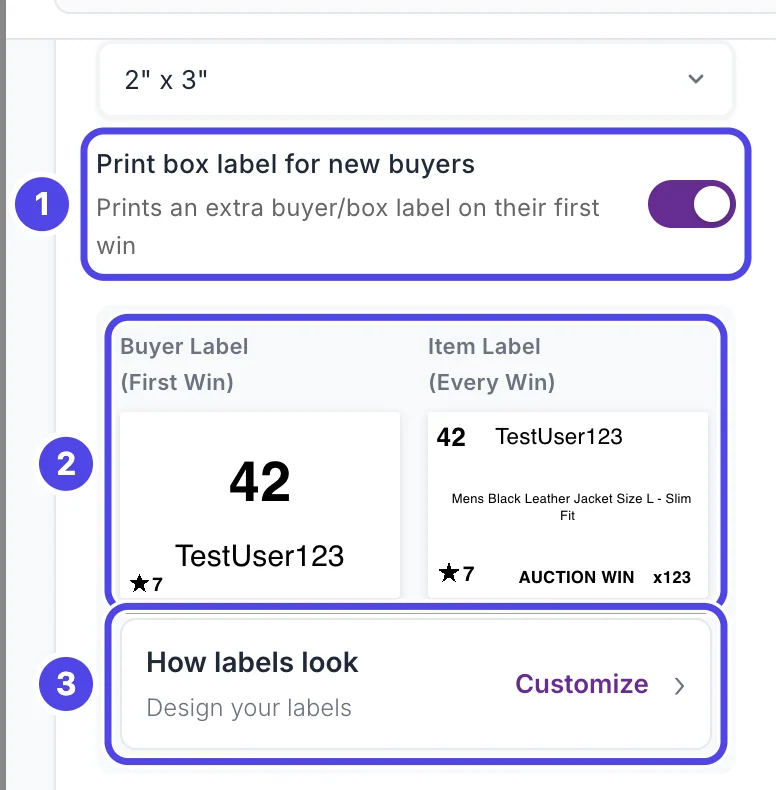
- With Every Item + Buyer, a switch appears: Print box label for new buyers. It starts on. Turn it off if you don't use boxes; then only the numbered item labels print.
- The label previews show what prints with your print mode and label size, filled in with a pretend buyer called TestUser123. Here they show the Buyer Label (First Win) and the Item Label (Every Win). Change the mode or the size and the previews change with it.
- How labels look opens Customize, where you pick or edit the design of each label. See Change which design a label uses.
Step 7: Print a test label
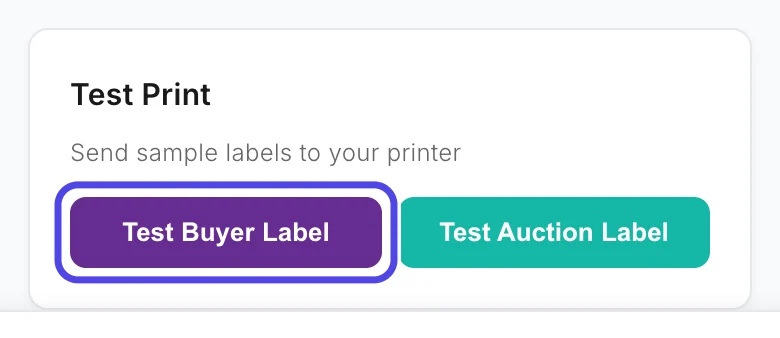
Scroll to the Test Print card at the bottom of the drawer and click Test Buyer Label or Test Auction Label. NotBot sends one sample label to your printer and, once the printer takes it, says Label sent to printer. under the buttons.
Which buttons you see depends on the print mode: Test Buyer Label shows with Buyer Only, and with Every Item + Buyer while Print box label for new buyers is on. Connect and test your printer explains what to check on the label that comes out.
Turn winner popups on or off
Step 8: Use the Show popup on your desktop switch
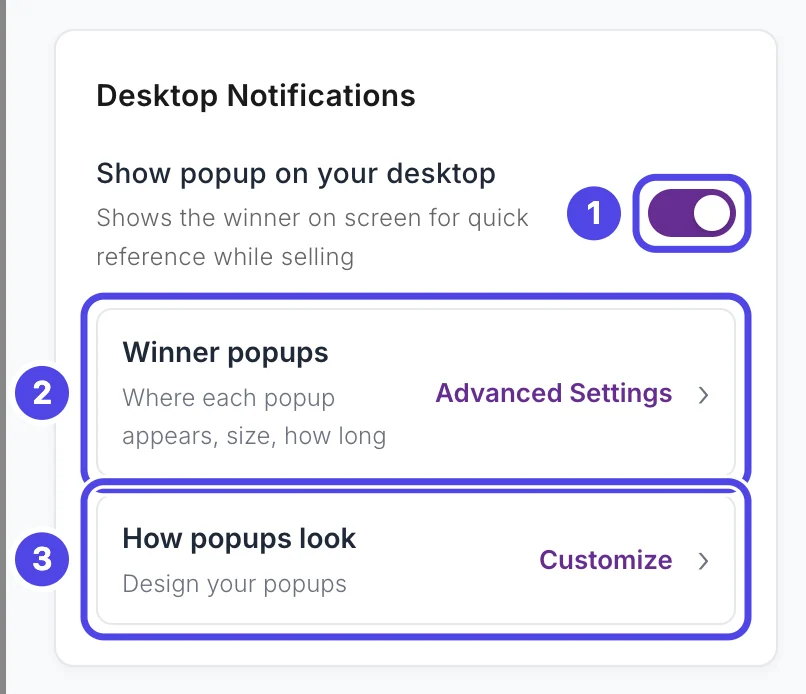
The Desktop Notifications card controls winner popups, the small window that shows each winner on your screen while you sell.
- Show popup on your desktop turns them all on (purple) or off (grey). They start on. A change counts from the next sale.
- Winner popups opens Customize › Advanced Settings › Winner popups: where each popup appears, its size, and how long it stays.
- How popups look opens Customize on the Popups tab, where you change the design.
Set up winner popups covers each of these.
Find every other setting
Step 9: Search all settings
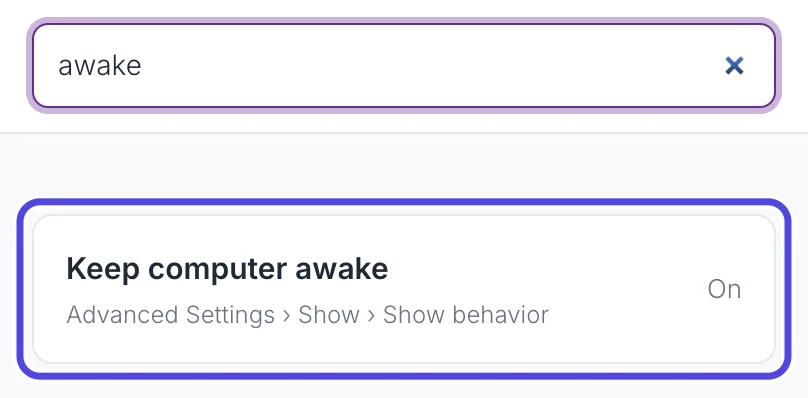
Click Search all settings under the tabs and type a word for what you want, in your own words. Here we type awake. The drawer lists every matching setting, with the page of Advanced Settings it is on and what it is set to now.
Click a result, or press Enter for the first one. The drawer closes and Customize › Advanced Settings opens at that setting. To clear the search, delete the word, or press Esc while the cursor is in the box. Find any setting has more ways to search.
Step 10: Click the Advanced tab
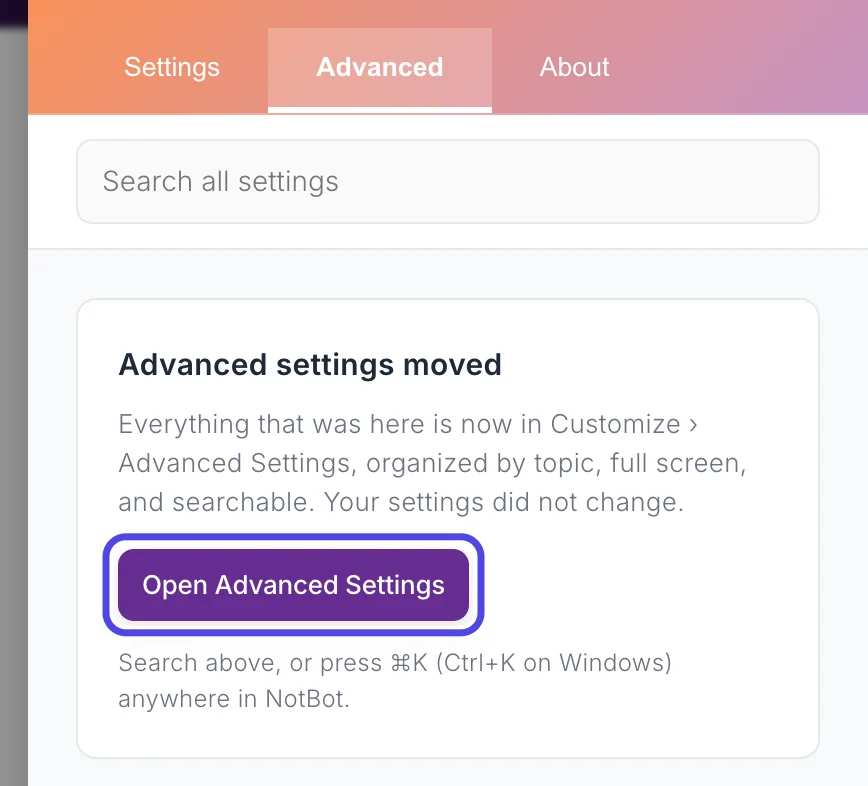
Click Advanced, the middle tab at the top of the drawer.
The settings that used to live here are now in Customize › Advanced Settings, full screen and grouped by topic: label types, rules and filters, printers and routing, winner popups, photos, show behavior, sync and devices, and updates and privacy. The tab says Advanced settings moved and has an Open Advanced Settings button that closes the drawer and takes you there. The Advanced settings row on the Settings tab does the same.
Step 11: Click the About tab
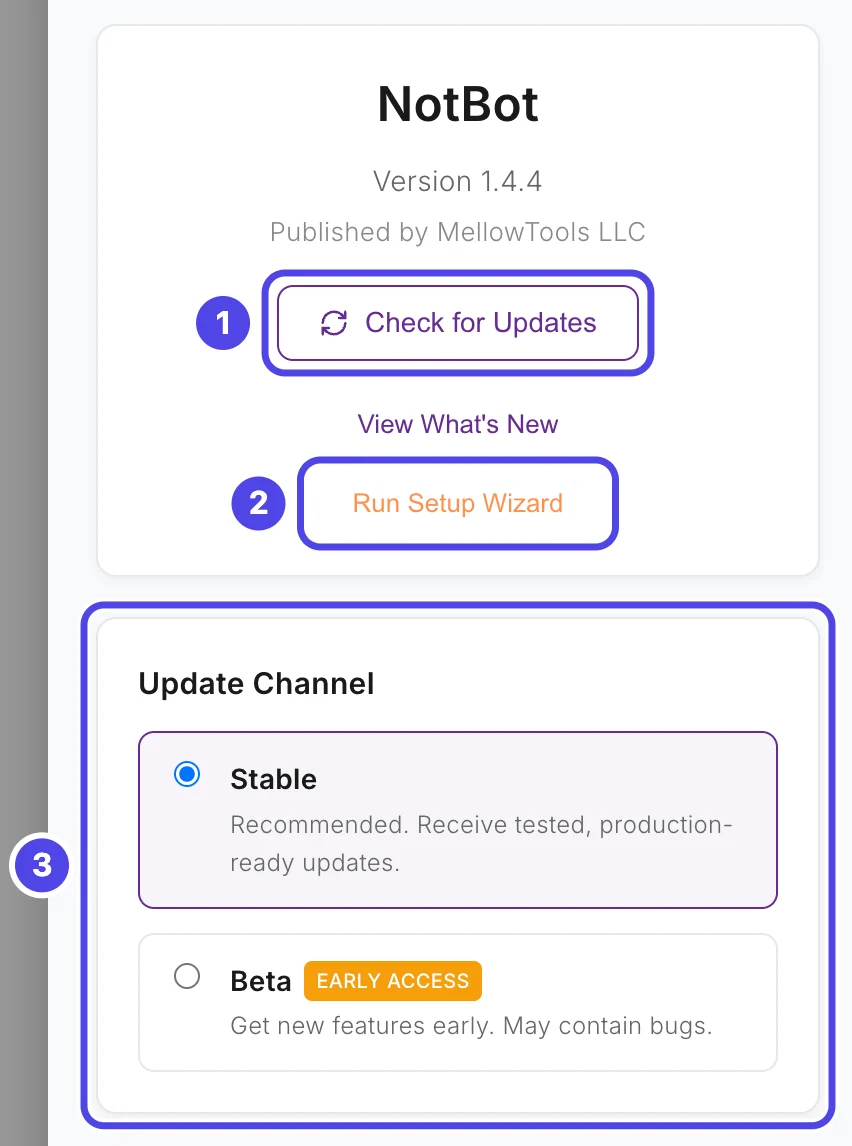
Click About, the last tab. It shows:
- Check for Updates, under the version of NotBot you have. See Update NotBot, see what is new, and get help.
- Run Setup Wizard closes the drawer and opens the Getting Started window again. See Set up NotBot with the Getting Started window. View What's New, just above it, shows what changed in recent versions.
- Update Channel: Stable (recommended) or Beta, which gets new features early.
Further down are Privacy & Data Sharing (what NotBot shares with us, and the analytics switch; see Privacy), links to the terms and privacy policy, and the support email address.
Close the drawer
Step 12: Click Done
Click the purple Done button at the bottom right of the drawer. The × at the top right, or a click on the show outside the drawer, closes it too.
Your changes are already saved, so closing the drawer never undoes anything. Next time it opens on the Settings tab.
If something looks different
I changed the print mode in the middle of a show. Do I need to restart?
No. NotBot saves the change at once and uses it from the next sale. Labels that already printed are not printed again.
I don't see the Test Buyer Label button
It only shows when your settings print box labels: with Buyer Only, or with Every Item + Buyer while Print box label for new buyers is on. With Every Item there is only Test Auction Label.
The setting I want is not in the drawer
Type a word for it in Search all settings at the top of the drawer, or click the Advanced settings row. Every setting is in Customize › Advanced Settings.
The drawer covers my show
NotBot keeps following the show and printing while the drawer is open. Click Done, or anywhere on the show outside the drawer, to close it.