Step-by-Step Guides
Change which design a label uses
See which labels NotBot prints, make your own copy of a design, and switch a label to it or back to the built-in design.
Last updated 2026-10-08 · Applies to NotBot 1.4.4+
Every label NotBot prints uses a design: what is on the label and where. NotBot comes with a built-in design for every label and size. This guide shows where to see which labels print and which design each one uses, how to make your own copy of a design, and how to switch a label to another design and back.
To change what is on a design (the text, the sizes, where things sit), see Edit a label in the label editor.
Before you start
- NotBot is installed and you are signed in. If not, follow Sign in to NotBot.
- You know your print mode and label size. They decide which labels print. See Choose which labels print and Connect and test your printer.
See which labels print
Step 1: Click Customize
In the purple bar at the top of the NotBot window, click Customize. It opens on the Labels tab.

Step 2: Look at the labels that print right now
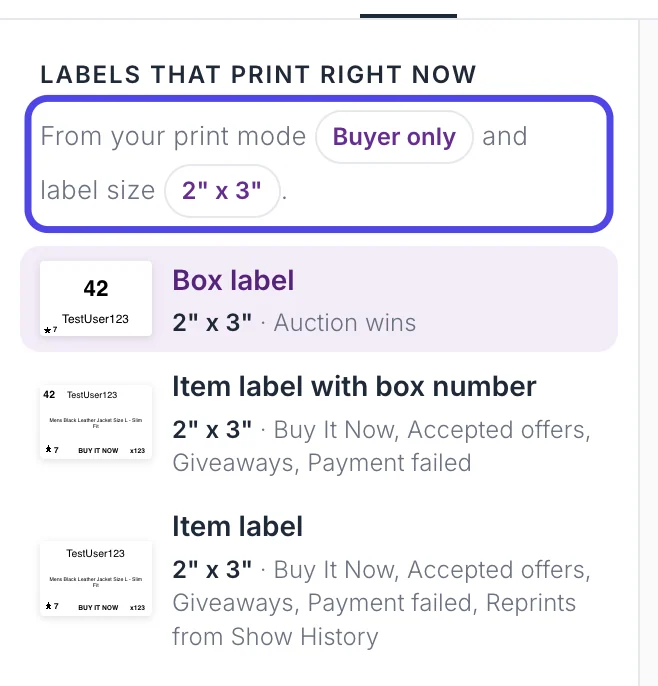
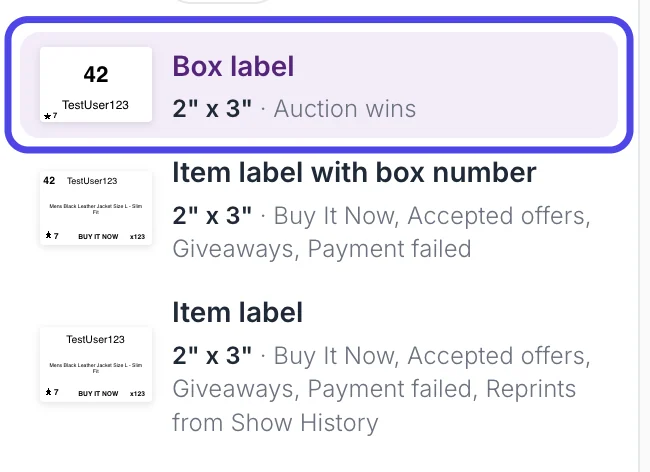
The list on the left, Labels that print right now, has one row for each label your settings can print. Each row shows a small picture of the label, its name, its size and what it prints for. With Buyer Only, the print mode NotBot starts with, you see:
- Box label: the numbered label a buyer gets the first time they win.
- Item label with box number: for a sale by a buyer who already has a number.
- Item label: for a sale by a buyer who has no number yet.
The line above the list (circled) says why: From your print mode Buyer only and label size 2" x 3". Click Buyer only or 2" x 3" in that line to open that setting in Advanced Settings and change it. The list changes with it, because a different print mode or size prints different labels.
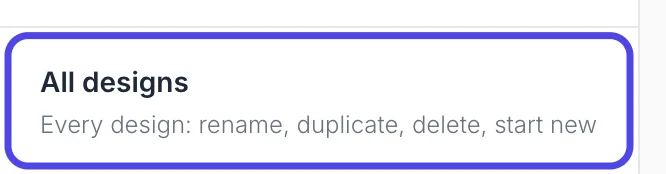
At the bottom of the list is All designs, every design you have, used or not.
Step 3: Click Box label
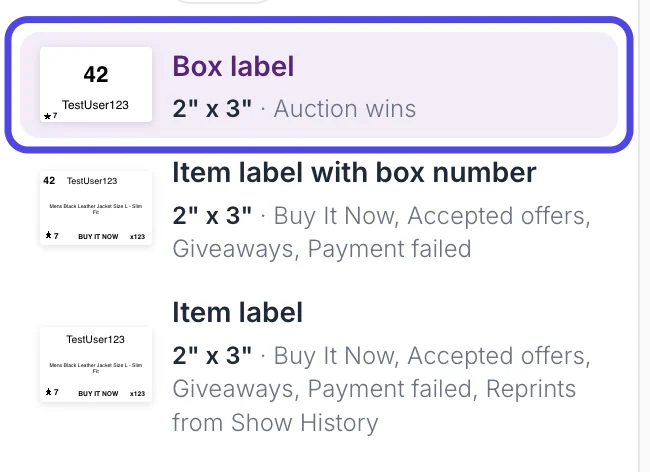
Click a label in the list to see it. In this guide we click Box label, the label you stick on each buyer's box.
Step 4: Read which design it uses
The right side shows the label as it prints today, filled in with a sample buyer. At the top:
- The label's name and size, and Prints for: the sales that print this label.
- Design: the name of the design it uses. built in means it is one of the designs that come with NotBot.
Two buttons sit at the top right. Edit opens the label editor (see Edit a label in the label editor). Change design switches the label to another design, shown later in this guide.

Make your own copy of a design
A label can only switch to a design of the same size and kind. Until you have your own designs, the built-in one is the only choice, so first make a copy. A copy starts out the same as the original; you can then change it in the label editor without touching the built-in design.
Step 5: Click All designs
At the bottom of the list on the left, click All designs.
Step 6: Find the design in the Built in list
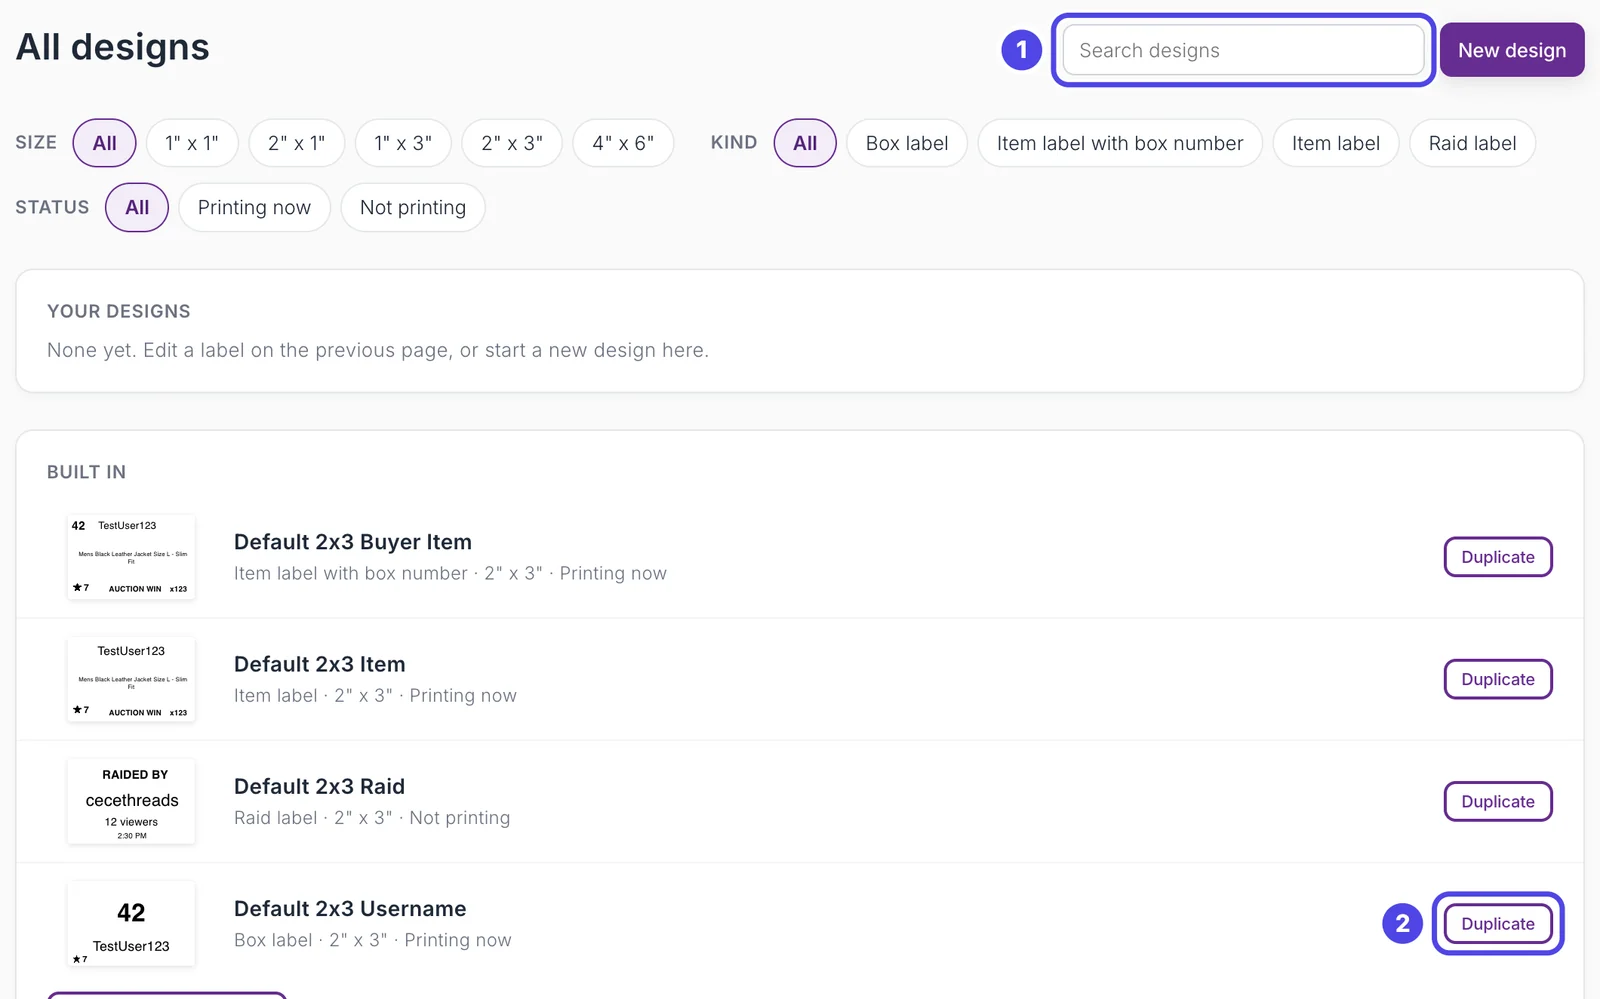
All designs lists your own designs under Your designs and the designs that come with NotBot under Built in. Each row says what kind of label the design is for, its size, and Printing now or Not printing.
To find a design quickly, type part of its name in Search designs at the top (1), or click the buttons under it to show one Size, Kind or Status only. Built in lists only the sizes you print; Show every size at the bottom of that card shows the rest.
The box label's design is Default 2x3 Username (2). Click Duplicate on its row.
Step 7: Click Rename on your copy
Your copy appears under Your designs, named after the original with (mine) at the end. It says Not printing: no label uses it yet.
Your own designs have more buttons than built-in ones: Edit, Rename, Duplicate and Delete. Give the copy a name you will recognize: click Rename.

Step 8: Type a name and click Save name
Type the new name in the box, for example Maple Street box label, then click Save name (or press Enter). Cancel keeps the old name.

Tip: To change what is on your copy, click its Edit button. Edit a label in the label editor shows how.
Switch a label to another design
Step 9: Click the label again
In the list on the left, click Box label again.
Step 10: Click Change design
At the top right of the label, click Change design.

Step 11: Pick the design
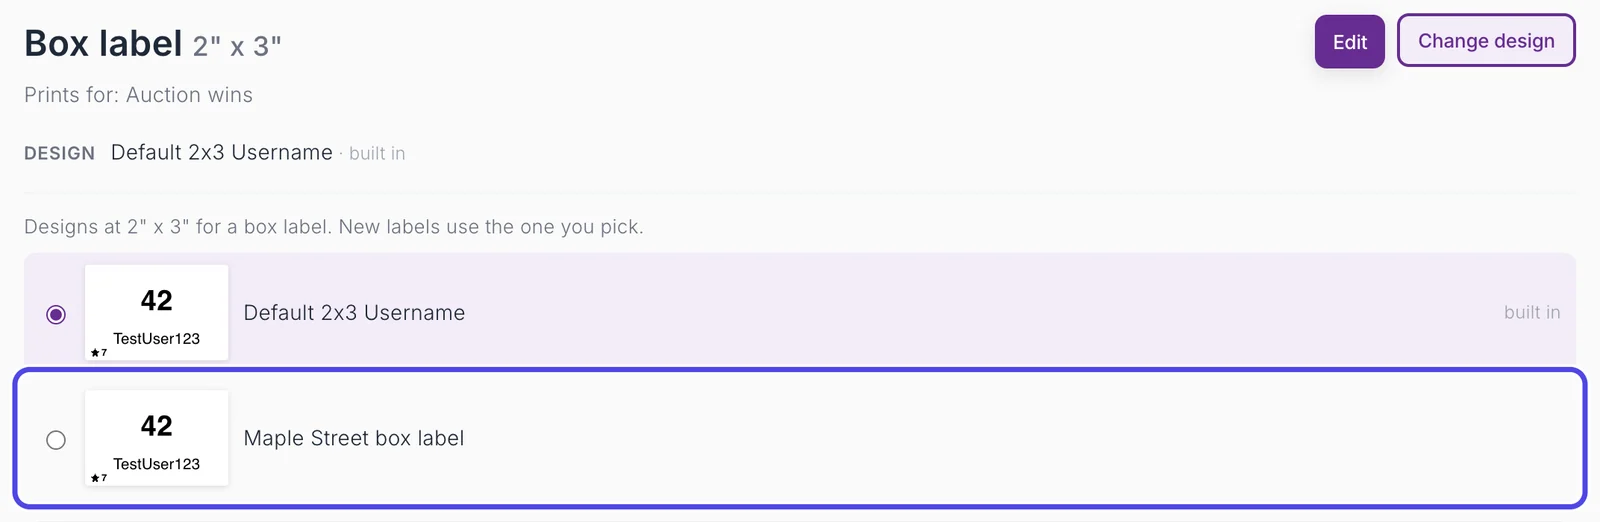
A list opens under the label's name with every design of the same size and kind, each with a small picture. The one in use is selected.
Click the design you want, here Maple Street box label. The list closes and the Design line shows the new name. New labels print with it from the next sale. Labels already waiting to print keep the design they had.
Step 12: Check the Design line
The Design line now says Maple Street box label, without built in. In All designs, your design now says Printing now and the built-in one Not printing.
To go back, click Change design again and pick the design marked built in. Nothing is lost: both designs stay in All designs.

If something looks different
Change design only lists the built-in design
A label can only use a design of the same size and kind (a box label design for a box label, at the same size). Make a copy first: open All designs and click Duplicate on the built-in design, or click Edit on the label and save your change.
The label I want to change is not in the list
The list only has the labels your print mode and sizes can print right now. In Every Item mode there is no box label, for example. Change the print mode or size (click it in the line above the list), or find the design in All designs.
I deleted a design that a label was using
NotBot asks first. When you click Delete on a design a label uses, it asks which design those labels should use instead, then deletes it and switches them with Delete and switch. While labels are waiting to print with a design, its Delete button is greyed out until they have printed.
Can I change a built-in design?
Not directly. Click Edit on the label: when you save, NotBot keeps the built-in design as it is and saves your own copy with (mine) in its name, then puts the copy on the label.