Step-by-Step Guides
Choose which labels print
Pick a print mode, see the real labels each one prints, and turn each kind of label on or off.
Last updated 2026-10-08 · Applies to NotBot 1.4.4+ · Identical to the stable docs
Two settings decide what comes out of your printer. The print mode decides which labels a sale prints: a box label with the buyer's number, an item label, or both. Label types let you turn each moment on or off (auctions, Buy It Now, offers, giveaways, failed payments, raids) and add bonus labels or box label reprints.
The pictures come from NotBot's practice show (NotBot Live), so the left side of the window shows a practice marketplace where your selling platform, such as Whatnot, would be.
Before you start
- NotBot is installed and you are signed in. If not, follow Sign in to NotBot.
- Your printer is set up. If not, follow Connect and test your printer.
The three print modes
- Buyer Only (the setting NotBot starts with): a box label the first time someone buys in a show. It shows a big buyer number and their username. Stick it on a box and put everything that buyer wins inside.
- Every Item: an item label for every sale, with the buyer's username, the item and the kind of sale. It never gives out buyer numbers.
- Every Item + Buyer: an item label for every sale with the buyer's number on it, plus a box label for new buyers.
You can change the mode at any time, even in the middle of a show. The new mode applies from the next sale.
Change the print mode
The print mode is in two places, and both change the same setting. The Settings drawer is the quick route, even in the middle of a show. Customize › Advanced Settings › Basics shows each mode with a longer description.
Step 1: Quick route: pick a mode in the Settings drawer
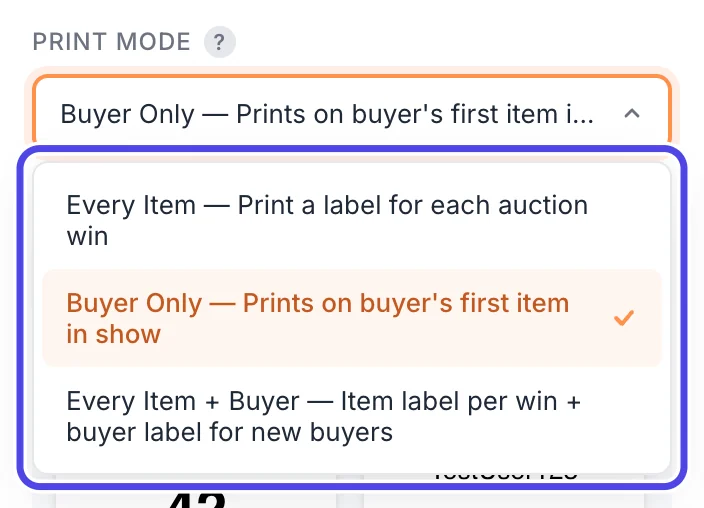
Click ⚙️ Settings at the top of the NotBot panel on the right. In the drawer that slides in, click the box under PRINT MODE, then click the mode you want in the list (circled). NotBot saves it right away; click Done at the bottom of the drawer to close it.
Change everyday settings in the Settings drawer goes through the drawer one step at a time.
Step 2: Click Customize
For the full view, use Advanced Settings. At the top of the NotBot window, click Customize. It's next to Dashboard.

Step 3: Open Advanced Settings
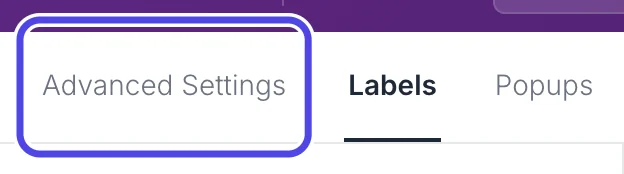
Customize opens on the Labels tab. Click Advanced Settings, the first tab at the top left.
Advanced Settings opens on Basics, the everyday settings.
Step 4: Pick a print mode
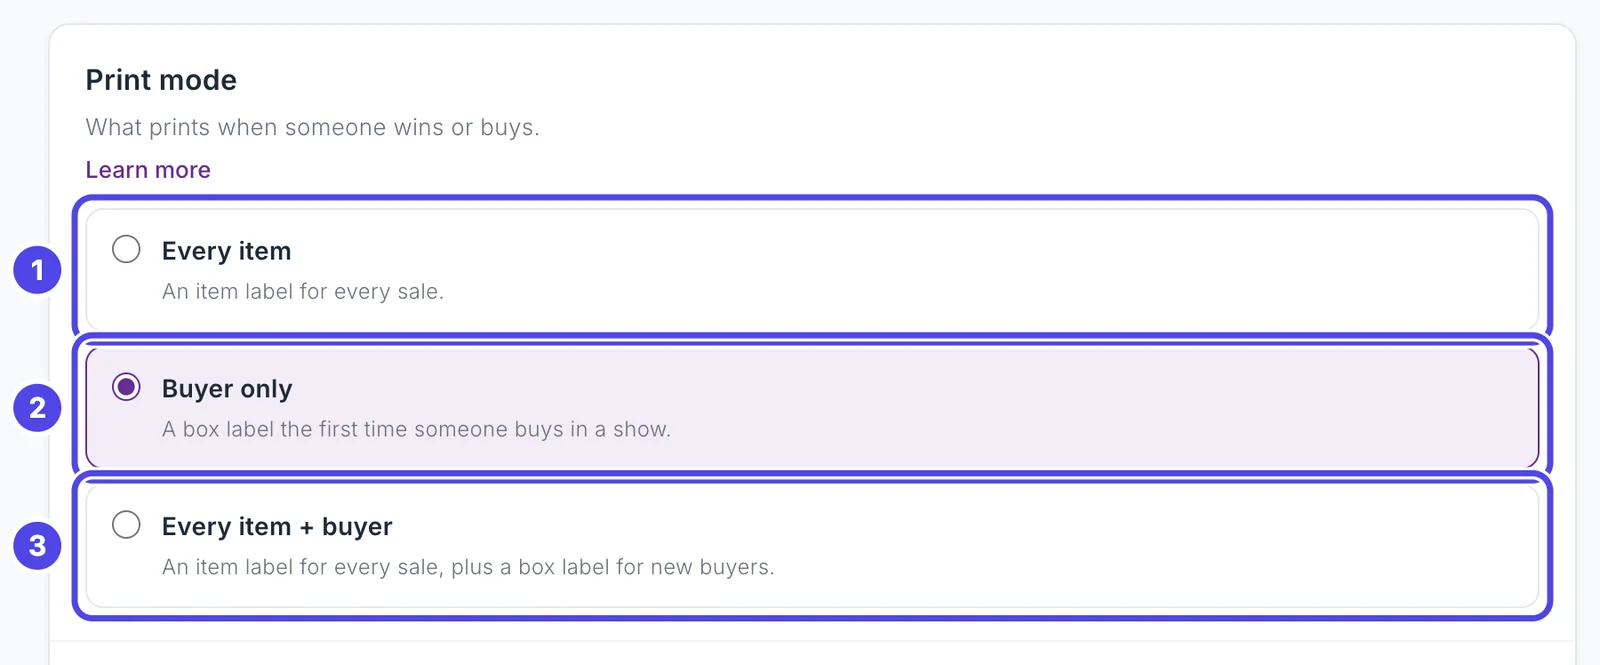
Under Print mode, click the mode you want:
- Every Item: an item label for every sale.
- Buyer Only: a box label the first time someone buys in a show.
- Every Item + Buyer: an item label for every sale, plus a box label for new buyers.
NotBot saves your choice right away. There is no Save button; the top right corner says Changes save automatically.
Step 5: Choose whether new buyers get a box label
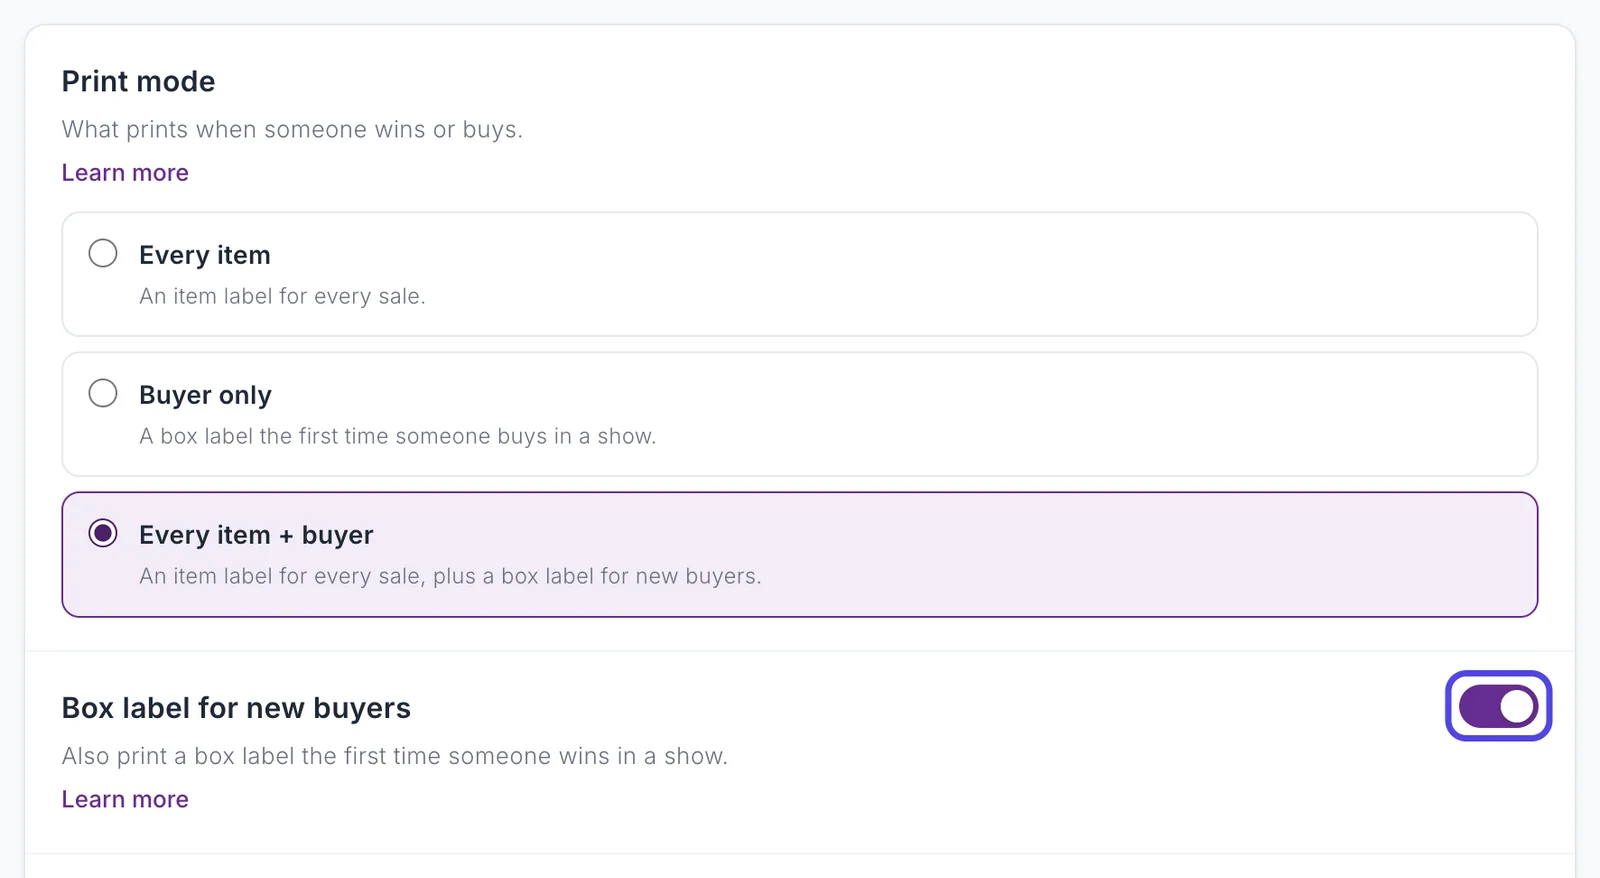
When you pick Every Item + Buyer, a switch appears under the print mode: Box label for new buyers. It starts on.
Turn it off if you don't use boxes. Then only the numbered item labels print. That is still different from Every Item, which never gives out box numbers.
What Buyer Only prints
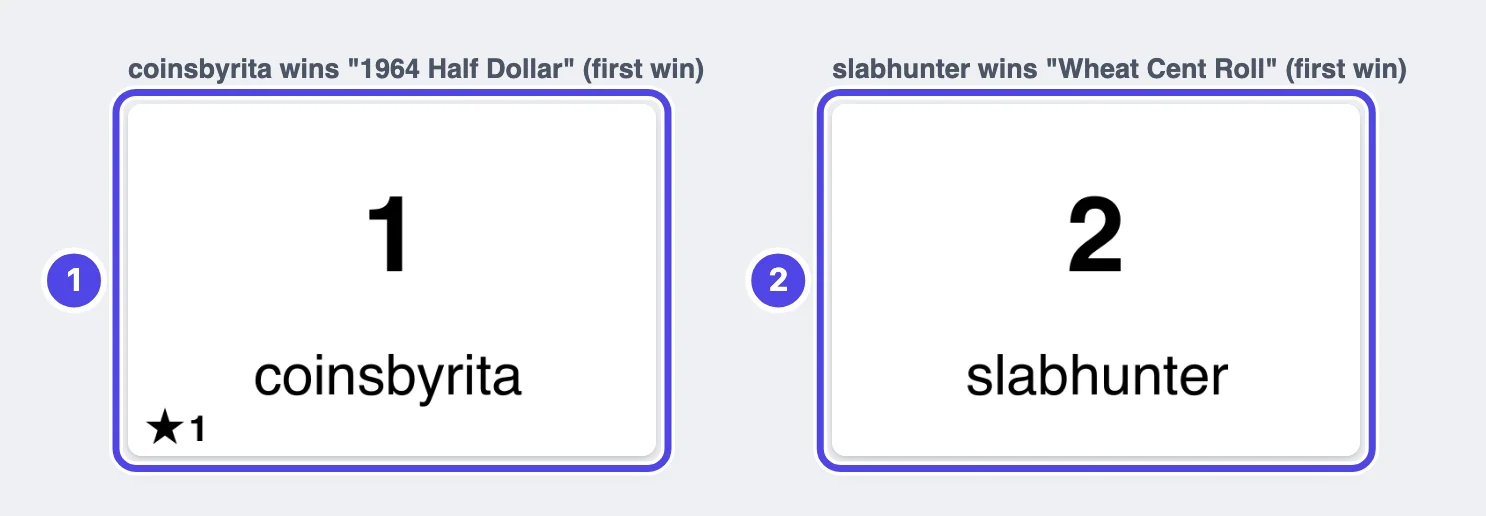
Buyer Only is made for the box method: each buyer gets one numbered label, and every item they win goes into the box with that number. The pictures below are the real labels NotBot printed during a practice show, at the 2" x 3" label size.
Step 6: Put the label on a box when a buyer wins for the first time
The first time a buyer wins an auction in your show, NotBot gives them the next buyer number (1, 2, 3 and so on) and prints one label with that number, big, and their username under it. Stick the label on an empty box and put the item inside.
The star in the corner (label 1) appears when Whatnot marks the winner as a first-time buyer, so you know to add a welcome note. The number next to it counts your first-time buyers in this show. Whatnot did not mark slabhunter (label 2) as a first-time buyer, so that label has no star. To turn the star off, open Customize › Advanced Settings › Rules & filters and turn off Star first-time buyers.
Step 7: Put later wins in the same box
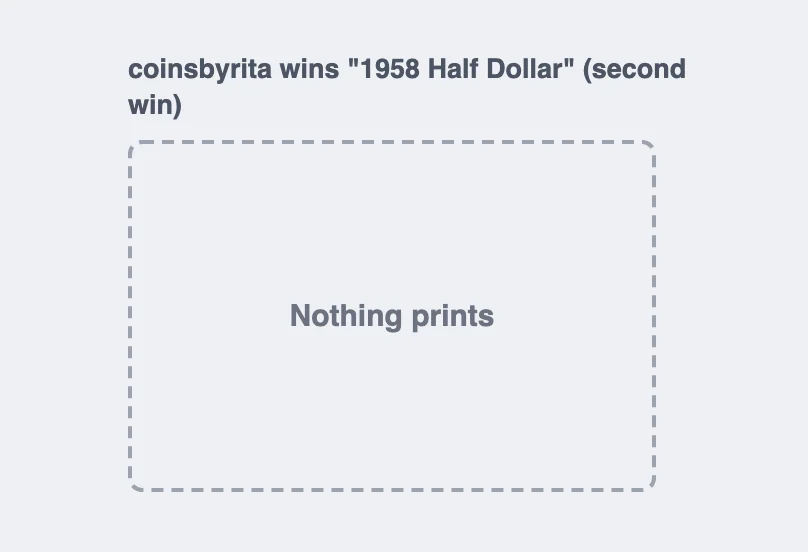
When the same buyer wins another auction in the same show, nothing prints. Find the box with their number and put the new item in it.
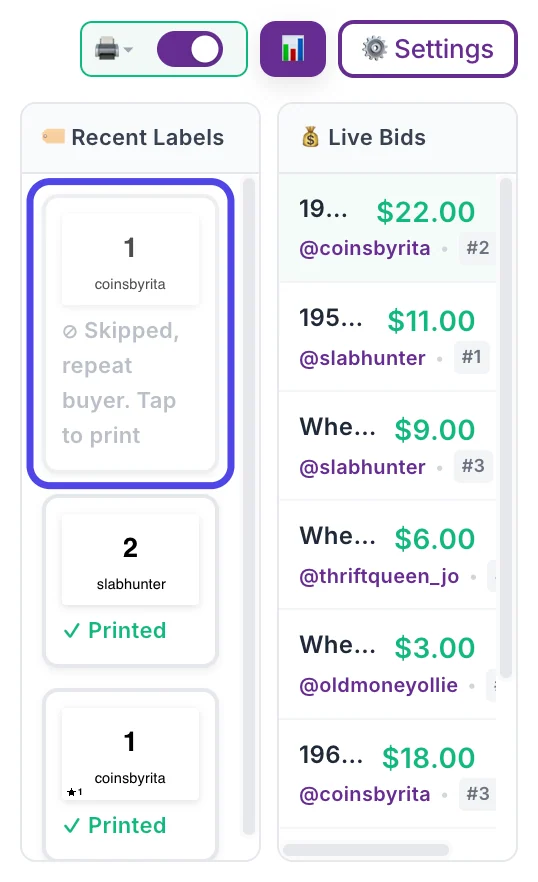
NotBot still records the sale. In the NotBot panel, Recent Labels shows the win greyed out with Skipped, repeat buyer. Tap to print. If you want a label anyway (for example, the item needs a second box), click that card and NotBot prints the box label with the same number.
Step 8: Look at giveaway and Buy It Now labels
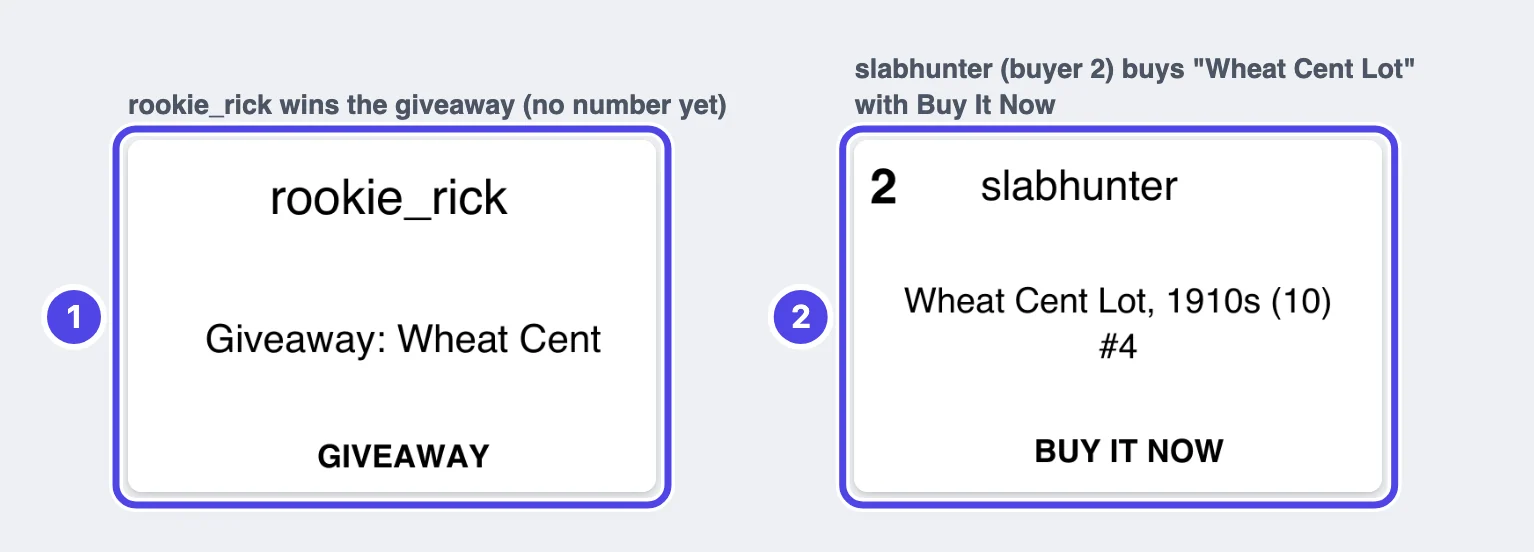
In Buyer Only, a giveaway, a Buy It Now sale or an accepted offer prints an item label to start with: the winner's username, the item and a tag at the bottom (GIVEAWAY, BUY IT NOW or OFFER ACCEPTED).
- If the buyer already has a number from an earlier auction in this show, the number is printed in the corner (label 2), so you know which box it goes in.
- If they don't have a number yet, there is no number (label 1). These sales don't hand out a new number unless you change it in Label types, shown later in this guide.
What Every Item prints
Every Item is for sellers who tag each item, not each box. It never hands out buyer numbers.
Step 9: Stick a label on every item
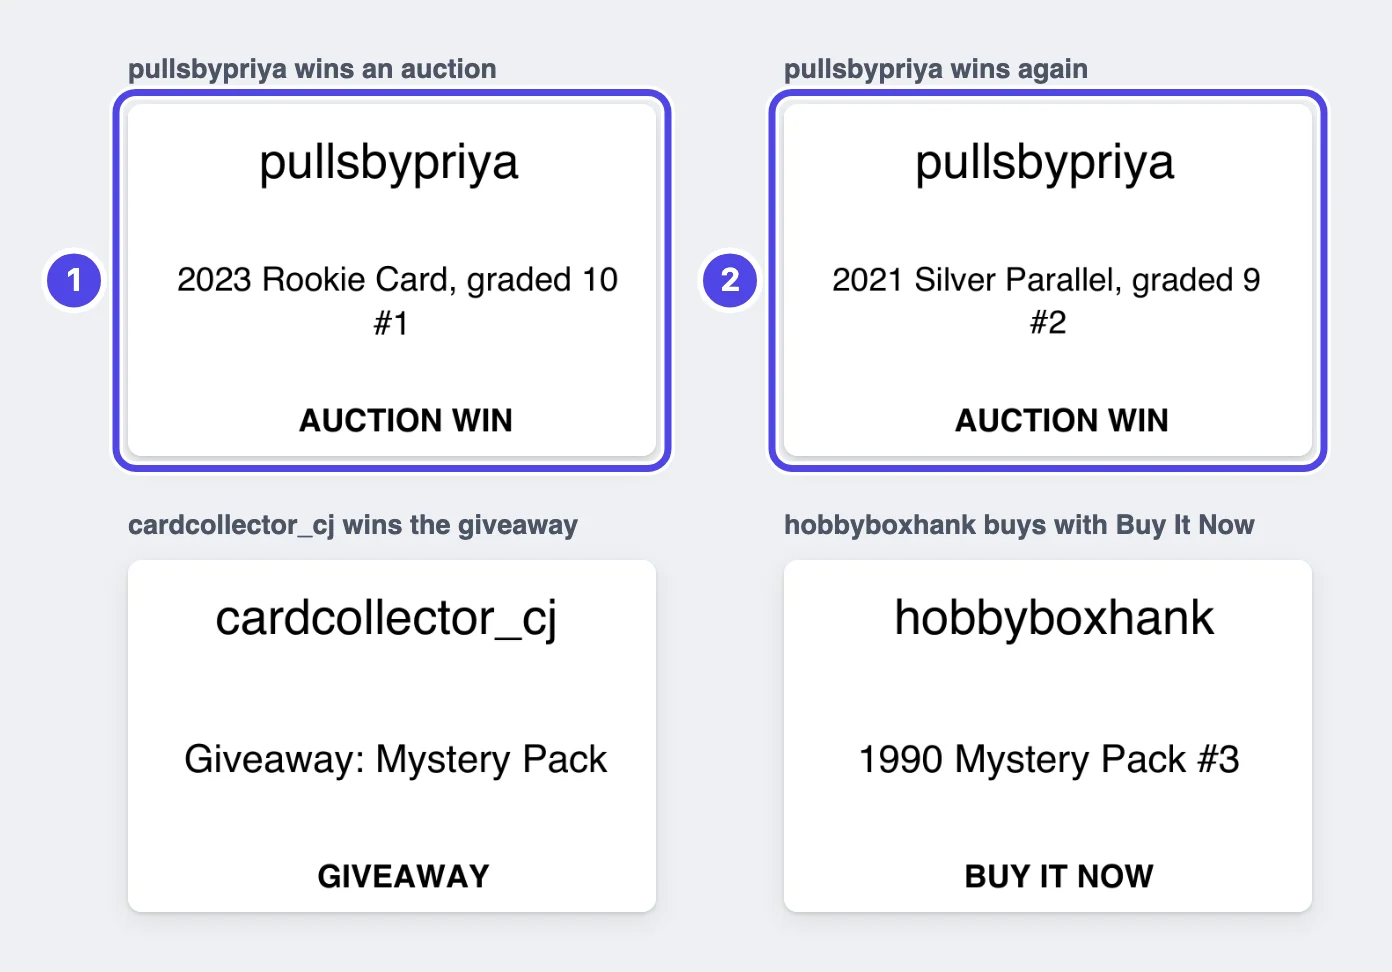
In Every Item, every auction win, giveaway, Buy It Now sale and accepted offer prints one label: the buyer's username at the top, the item name in the middle and the kind of sale at the bottom (AUCTION WIN, GIVEAWAY, BUY IT NOW or OFFER ACCEPTED).
A buyer who wins twice gets two labels (labels 1 and 2). There is no buyer number on any of them.
What Every Item + Buyer prints
Every Item + Buyer gives you both: a numbered box label for each new buyer and a numbered item label for every sale, so each item can be matched to its box.
Step 10: Match each item to its box by the number
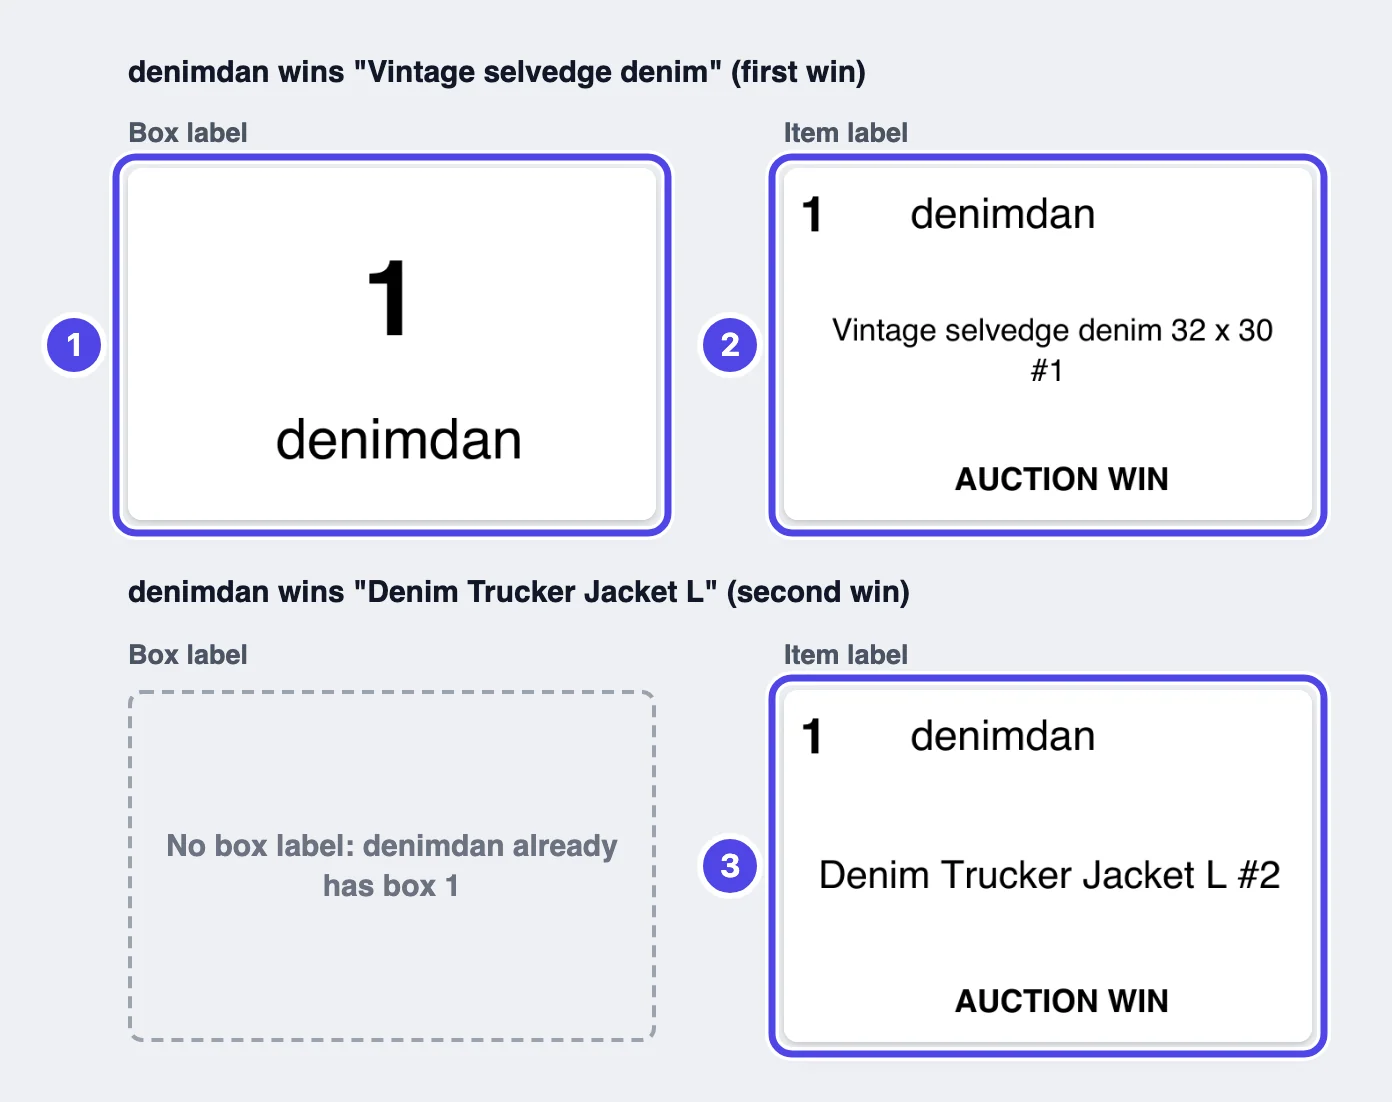
The first time a buyer wins, two labels print, one after the other:
- The box label: their buyer number, big, and their username. Stick it on the box.
- The item label: the same number, their username, the item and the kind of sale. Stick it on the item or its bag.
When the same buyer wins again, only the item label prints (label 3). It carries their number, so the item goes into the box with the same number.
Turn each kind of label on or off
The print mode applies to every sale. Label types lets you go one step further: stop printing for one kind of sale, print labels for show moments such as a failed payment, and add bonus labels or box label reprints.
Step 11: Open Label types
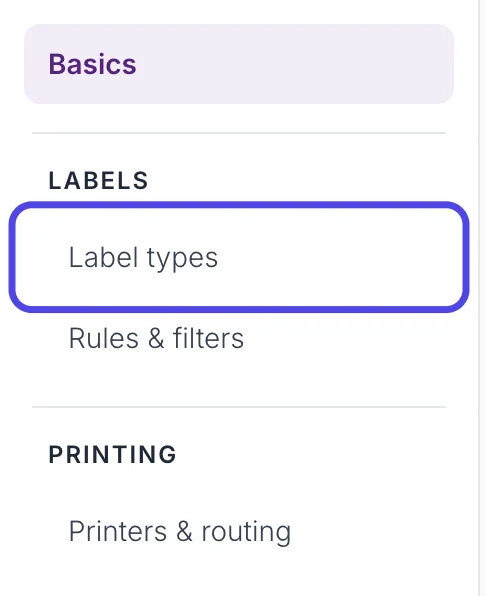
In Customize, on the Advanced Settings tab, click Label types in the list on the left, under LABELS.
The page lists every moment NotBot can print a label for, in four groups: Sales, Giveaways, Show moments and Repeat labels. Under each name you see what it does now, for example Follows print mode or Off.
Step 12: Turn a kind of label off
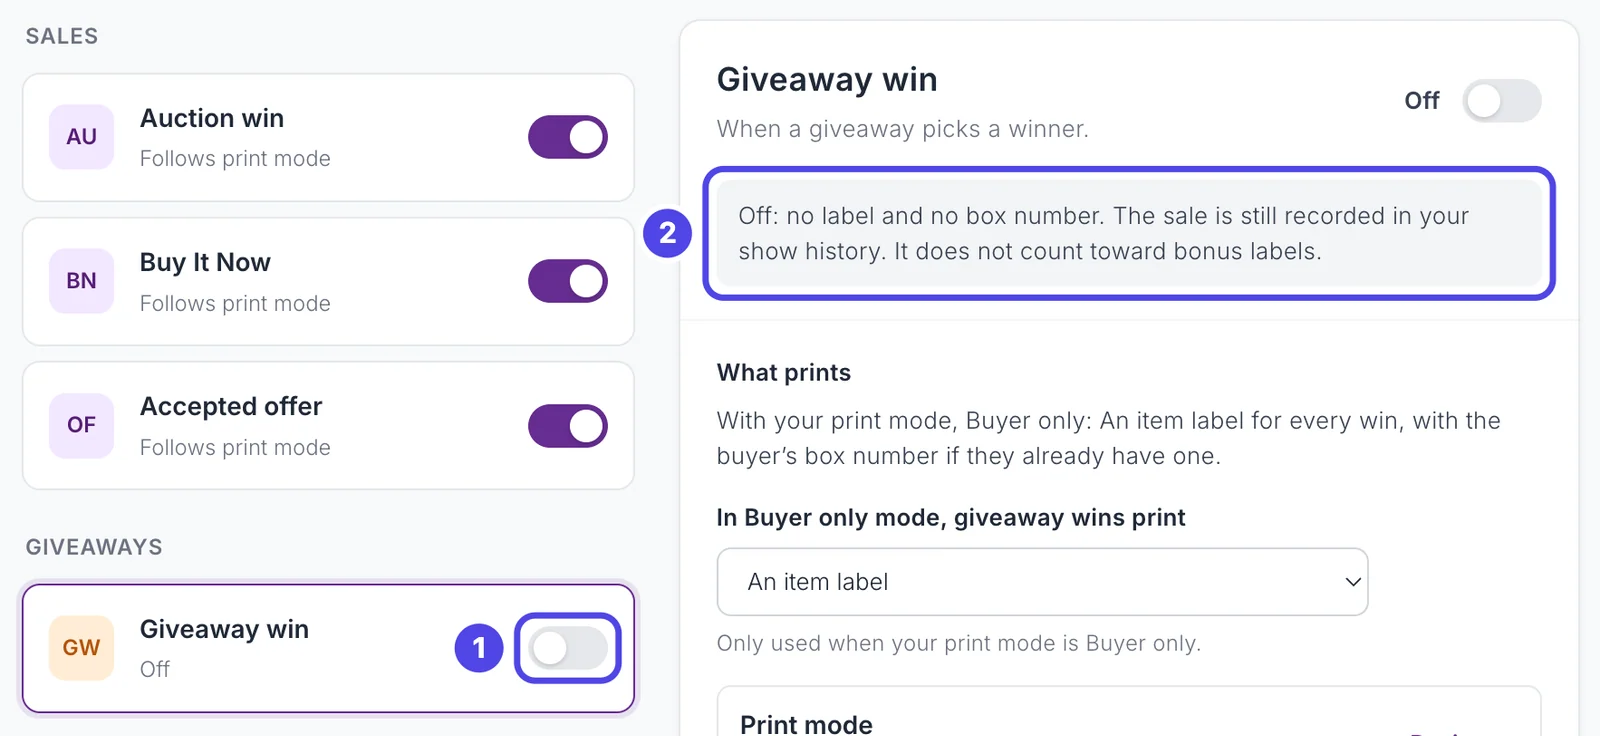
Each row has a switch on the right. Click it to turn that kind of label off (grey) or on (purple). The change applies from the next sale.
Here Giveaway win is turned off (switch 1). The panel on the right explains what that means (box 2): giveaways print no label and give out no box number, but the sale is still recorded in your show history.
The Sales group works the same way for Auction win, Buy It Now and Accepted offer.
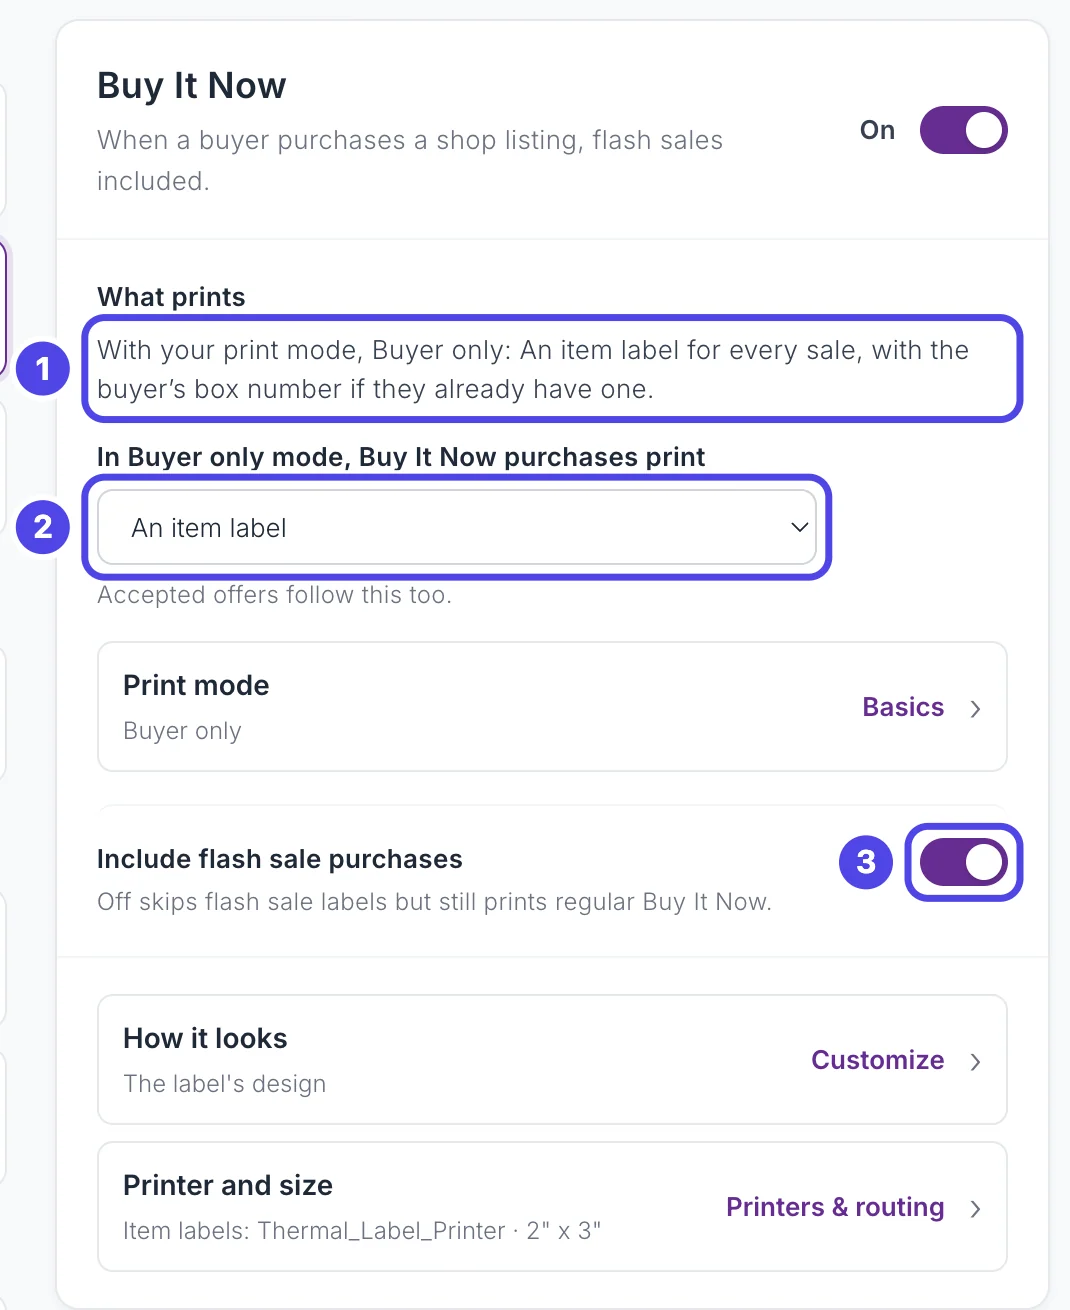
Step 13: Choose what Buy It Now prints in Buyer Only
Click the name Buy It Now (not its switch). The panel on the right shows everything about it:
- What prints explains, in words, what a Buy It Now sale prints with your print mode.
- In Buyer only mode, Buy It Now purchases print decides what a Buy It Now sale (and an accepted offer) prints when your mode is Buyer Only:
- An item label (the starting choice): an item label, with the buyer's number only if they already have one. No new number.
- A box label for new buyers: treats the sale like an auction win. A new buyer gets a numbered box label; a buyer who already has one gets nothing.
- Both: a box label for a new buyer, plus an item label with their number on every sale.
- Include flash sale purchases: turn it off to skip flash sale labels and still print regular Buy It Now.
Giveaway win has the same choice for giveaways. It is only used when your print mode is Buyer Only.
Step 14: Check the show moments
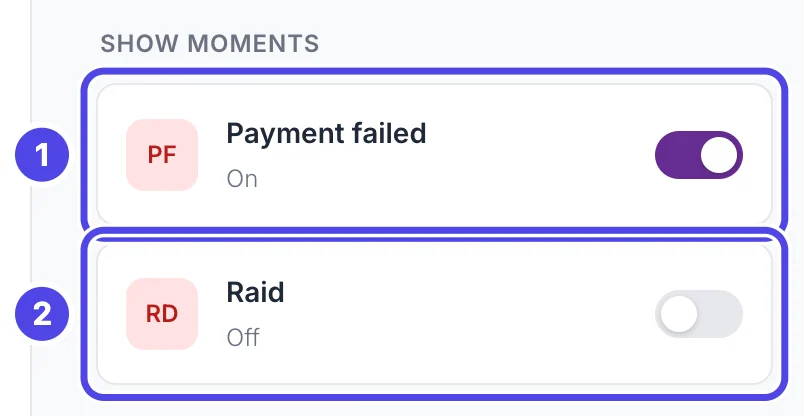
Under Show moments:
- Payment failed is on to start with. When a buyer's payment fails, NotBot prints an item label marked PENDING PAYMENT, with their box number if they have one. See Handle payment failures.
- Raid is off to start with. Turn it on to print a label when another seller raids your show on Whatnot, with the raiding seller's name, how many viewers they brought and the time. See Raid labels.
Add bonus labels and box label reprints
The Repeat labels group, at the bottom of the list, prints extra labels as a buyer keeps buying in a show. Both are off to start with.
Step 15: Print a bonus label every few purchases
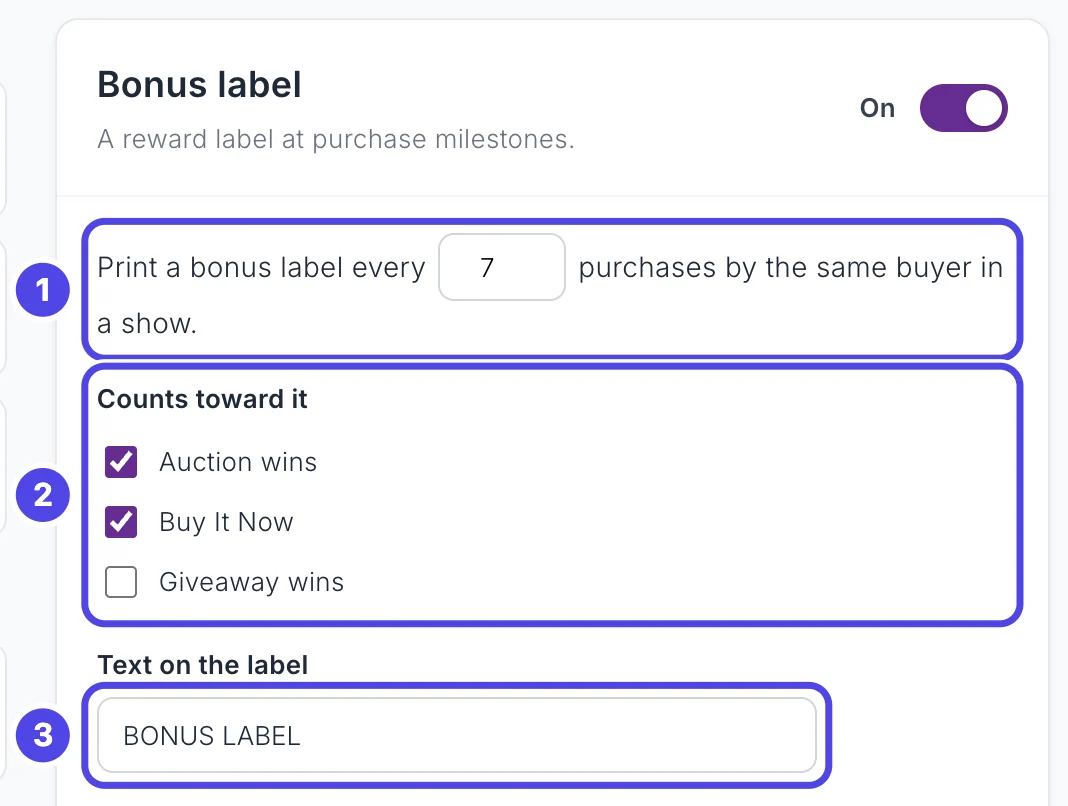
Click Bonus label, then turn on its switch at the top of the panel on the right.
- Print a bonus label every 7 purchases by the same buyer in a show. Type a different number (1 to 100) in the box to change how often.
- Counts toward it: tick the kinds of sale that count. Auction wins and Buy It Now start ticked, Giveaway wins does not.
- Text on the label: what the bonus label says. It starts as BONUS LABEL.
Use it to reward buyers who keep buying, for example a free card with every seventh purchase.
Step 16: Reprint a buyer's box label as they keep winning
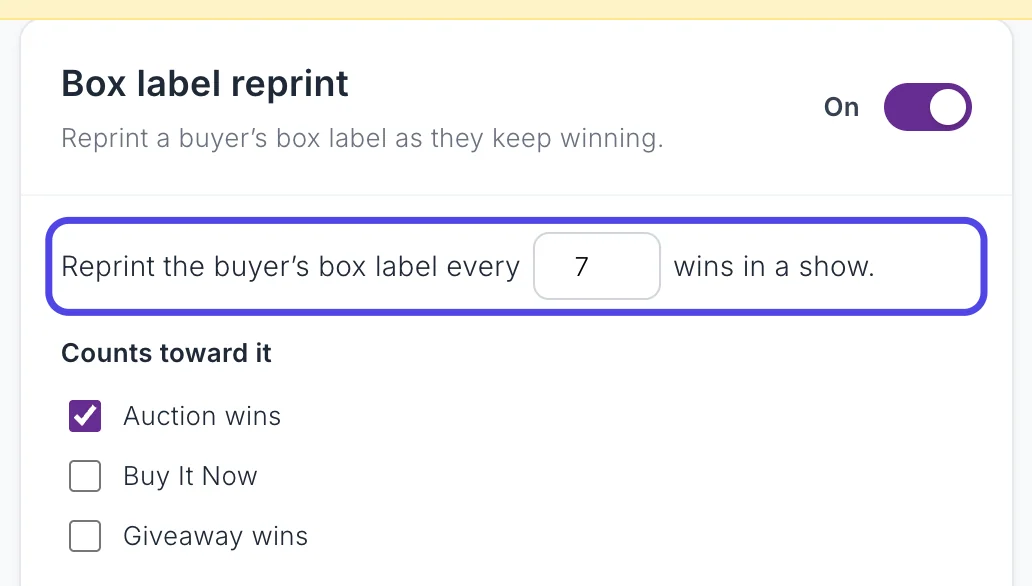
Click Box label reprint and turn on its switch. NotBot then reprints the buyer's box label every 7 wins in a show (change the number in the box). Under Counts toward it, only Auction wins start ticked.
This helps when one buyer fills more than one bag or box. Reprints are box labels, so they print only in Buyer Only, or in Every Item + Buyer with Box label for new buyers on. To reprint one by hand instead, see Reprint labels.
Quick comparison
| What happens | Every Item | Buyer Only | Every Item + Buyer |
|---|---|---|---|
| New buyer wins an auction | Item label, no number | Box label with number | Box label + item label, both numbered |
| Same buyer wins again | Item label, no number | Nothing | Item label with number |
| Giveaway win | Item label, no number | Item label (number only if they have one) | Item label with number, plus a box label if the winner is new |
| Buy It Now sale or accepted offer | Item label (number only if they got one earlier in the show) | Item label (number only if they have one) | Item label with number, plus a box label if the buyer is new |
The Buyer Only column shows the starting choices. Label types changes what giveaways, Buy It Now sales and accepted offers print in Buyer Only. Buyer numbers start again at 1 in every new show.
If something looks different
Nothing printed when a buyer won their second auction
That is how Buyer Only works: one box label per buyer per show. Put the item in the box with their number. To print a label anyway, click the greyed out card in Recent Labels that says Skipped, repeat buyer. Tap to print.
Giveaways or Buy It Now sales print nothing at all
Open Customize › Advanced Settings › Label types and check that the switch for Giveaway win, Buy It Now or Accepted offer is on. Also check Rules & filters: a Skip by item name rule can skip sales whose name matches. See Skip labels by name.
Giveaway labels have no number on them in Buyer Only
The winner had not won an auction yet in this show, so they had no number. To give giveaway winners a number, open Customize › Advanced Settings › Label types, click Giveaway win and set In Buyer only mode, giveaway wins print to A box label for new buyers or Both.
I changed the mode but nothing prints for any sale
The print mode is not the cause. Check that the auto-print switch beside the printer icon, to the left of Settings in the NotBot panel, is on. NotBot can turn it off when you move from one show to another. If the switch is on and nothing prints, follow Labels are not printing: step-by-step fixes.