Step-by-Step Guides
Labels are not printing: step-by-step fixes
Work through these checks in order when a sale comes in and no label comes out.
Last updated 2026-10-08 · Applies to NotBot 1.4.4+ · Identical to the stable docs
A sale came in and no label came out. Almost every time, the reason is one of the seven checks below, and NotBot shows you which one. Go through them in order. Most take less than a minute, and you can do all of them during a live show.
The pictures use a practice show on NotBot Live, a practice marketplace. The NotBot panel looks the same during your real show.
Before you start
- NotBot is open and signed in. If it isn't, follow Sign in to NotBot.
- Your label printer is turned on and plugged in to this computer.
- If you have never printed a label with NotBot on this computer, start with Connect and test your printer instead.
Start here: read Recent Labels
Step 1: Find Recent Labels
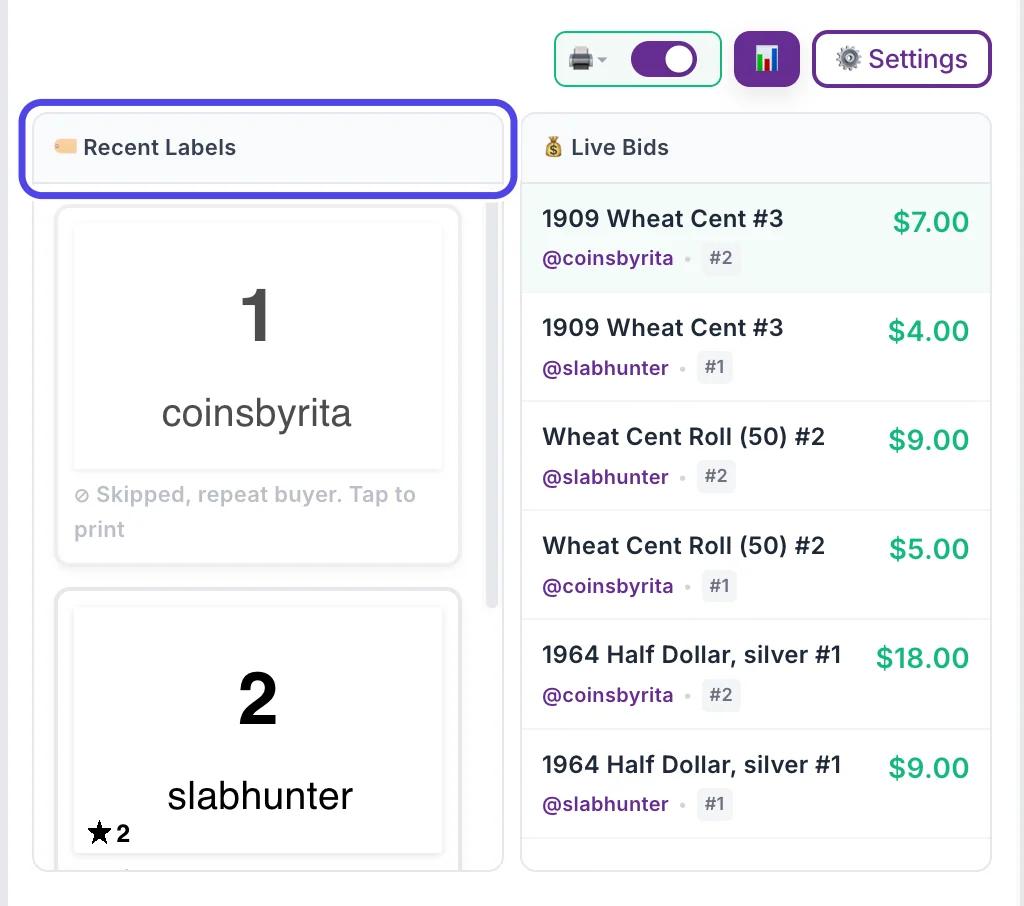
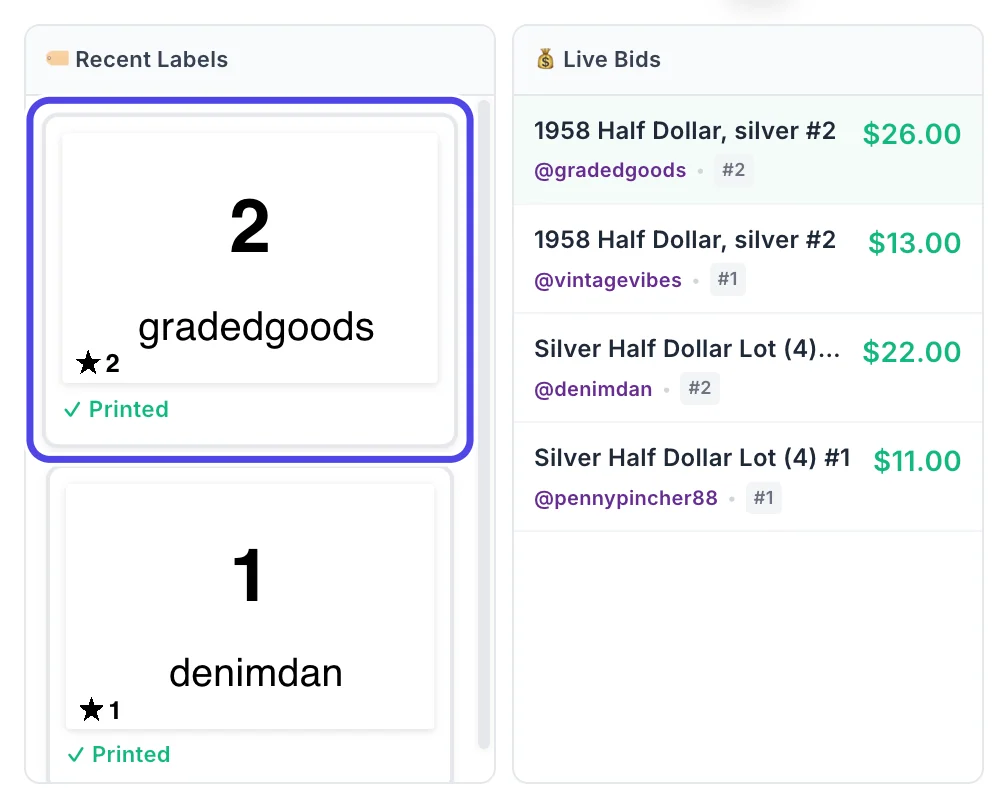
Look at the NotBot panel on the right side of the window. Under the buttons at the top is a box called Recent Labels. Every sale in your show gets a small card here, newest at the top, and the line under each card tells you what happened to its label:
- ✓ Printed: the printer took the label. If nothing came out, the problem is at the printer itself (see Check 3).
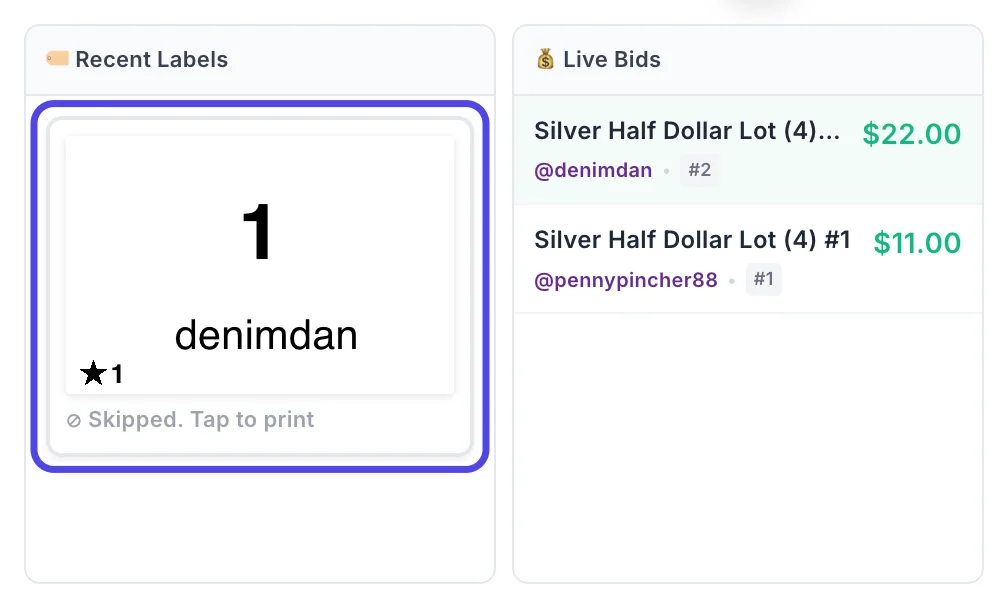
- ⊘ Skipped. Tap to print: printing was off when the sale came in (Check 1 or Check 6).
- ⊘ Skipped, repeat buyer. Tap to print: Buyer Only mode, working as designed (Check 7).
- ⚠ Check printer. Tap to reprint: the printer never confirmed the label (Check 3).
- ✗ Failed. Tap to retry: the printer refused the label (Checks 2 to 5).
If there is no card at all for a sale, look for it further down the panel, in Auction History (or Purchases for a Buy It Now sale). If it is there, NotBot recorded it but you told it not to print that kind of sale: check Customize › Advanced Settings › Label types and Rules & filters. If it is not there either, NotBot never saw that sale. Follow When the show connection drops instead.
Check 1: Printing is turned off
NotBot turns printing off by itself when you go from one show to a different show without closing NotBot, so the new show starts with printing off. Sales are still recorded while printing is off. Only the labels wait.
Step 2: Look for the red "Printing is disabled" box
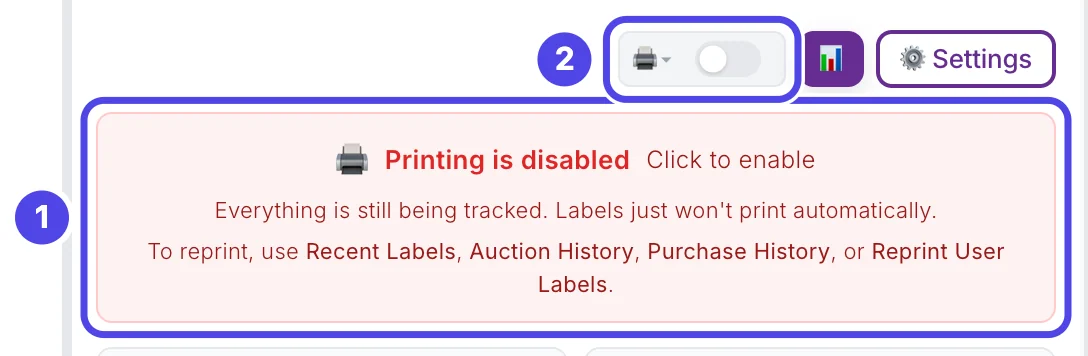
If printing is off, a red box that says Printing is disabled sits at the top of the NotBot panel (1). Above it, the switch next to the small printer button is grey instead of purple (2).
When NotBot switched printing off because the show changed, a message also appeared in the top right corner of the window: Auto-print disabled for new stream.

Step 3: Turn printing back on
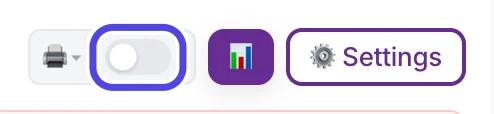
Click the grey auto-print switch next to the printer button. It turns purple and the red box goes away. Clicking the red box itself does the same thing.
From now on, every new sale prints on its own.
Step 4: Print the labels that were skipped
Turning printing on does not go back and print the sales that came in while it was off. Those cards say Skipped. Tap to print.
Click each skipped card once. NotBot sends that label to the printer, and the card changes to ✓ Printed.
Check 2: The printer is offline
NotBot keeps checking that your printer is switched on and connected. When it can't reach the printer, the printer button turns red.
Step 5: Look at the printer button
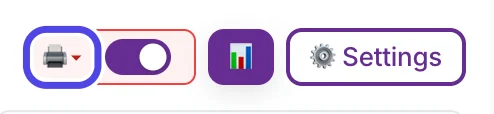
The printer button is the small printer picture at the top of the NotBot panel, to the left of the auto-print switch.
- A green outline around the button and the switch means the printer is ready and printing is on.
- A red outline means the printer is offline. A message also appears in the top right corner, for example Printer Thermal_Label_Printer offline: Printer offline or not connected.
Click the printer button to see the details.
Step 6: Read the printer status
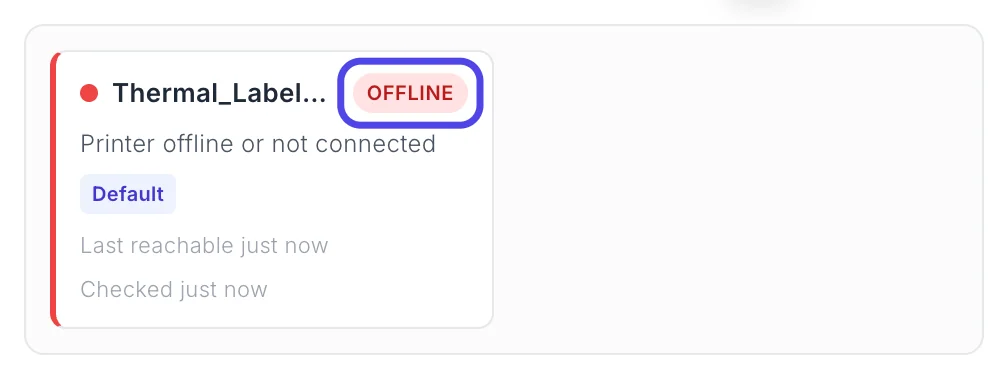
A card opens under the buttons with your printer's name. OFFLINE with Printer offline or not connected means the computer can't reach the printer right now. To fix it:
- Check that the printer is switched on and its light is on.
- Check both ends of the USB cable. Unplug it from the computer and plug it back in.
- Turn the printer off, wait 10 seconds, and turn it on again.
On Windows the card is called Print service and covers all printers at once, because Windows reports one status for the whole printing system.
Step 7: Check that it says Ready
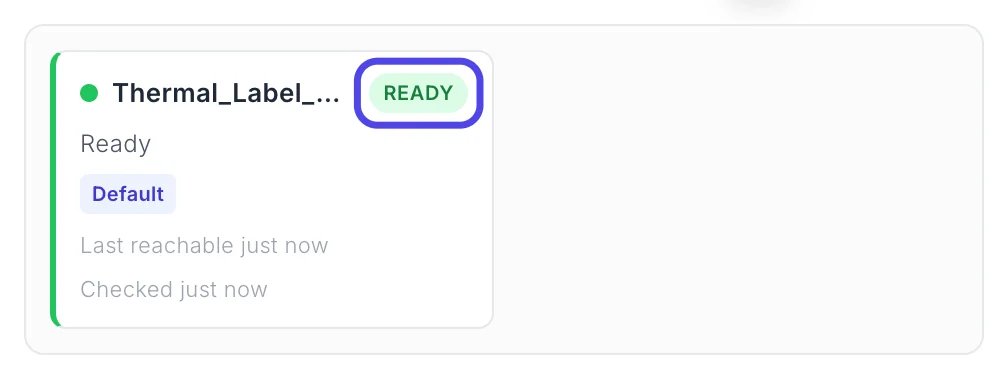
After the printer is back on, click the printer button twice (once to close the card, once to open it). Opening the card makes NotBot check the printer again right away.
The tag on the card now says READY in green. Click the printer button once more to close the card.
Check 3: Labels say "Check printer"
After NotBot sends a label, it watches the printer take it. If the printer hasn't finished the label within 2 minutes, the card changes to Check printer.
Step 8: Find labels that say "Check printer"
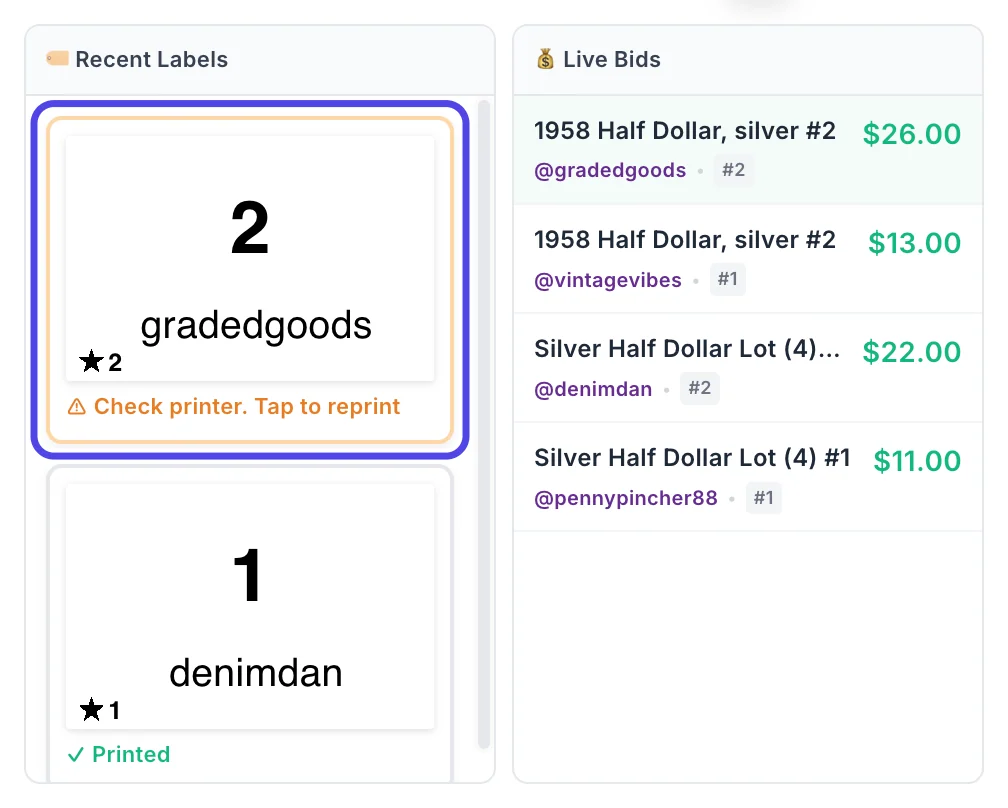
A card with an orange border and ⚠ Check printer. Tap to reprint means the label went to the printer but never came out the other side. Look at the printer:
- Is it out of labels, or is a label jammed?
- Is the lid fully closed?
- Is a light blinking red or orange? Turn the printer off and on again.
Before you reprint, check whether the label did come out after all, so you don't end up with two.
Step 9: Tap the card to print it again
Once the printer is working, click the card. NotBot sends the label again, and the card changes to ✓ Printed when it comes out, as in the picture.
If the card goes back to Check printer a second time, go on to Check 4.
Check 4: The right printer is chosen
NotBot sends labels to the printer named in its settings. If that is your office printer, a "Print to PDF" printer, or a label printer you no longer use, nothing comes out of the one on your desk.
Step 10: Open Settings
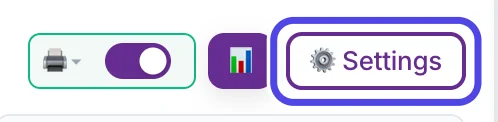
At the top of the NotBot panel, click ⚙️ Settings. The settings panel slides in from the right.
Step 11: Check the Printer box
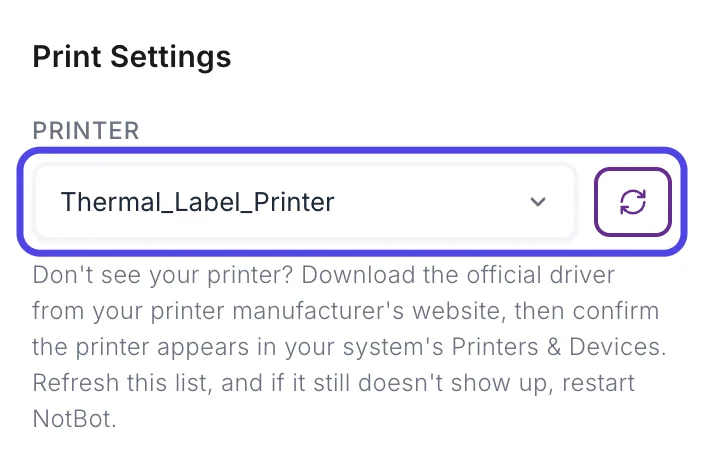
The Printer box at the top of Print Settings shows the printer NotBot uses. It must be your label printer's name.
If you don't see your label printer, click the round arrows button to the right of the box to look for printers again. Still missing? Install the driver from your printer maker's website, check that the printer shows up in your computer's printer settings, and then restart NotBot.
Step 12: Choose your label printer
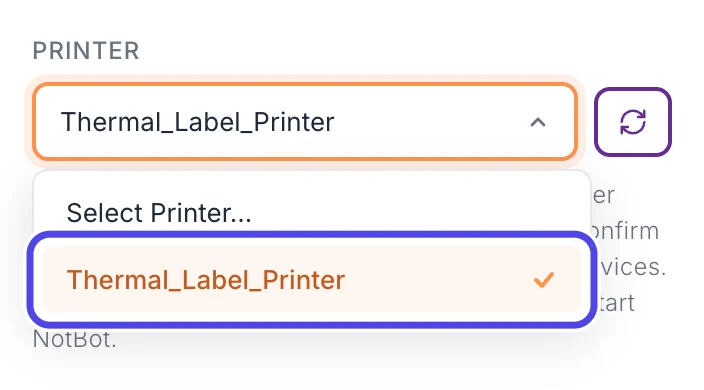
Click the Printer box to open the list, then click your label printer's name. The list closes and NotBot uses that printer from the next label on.
In this example the label printer is called Thermal_Label_Printer. Yours will have its own name, often the brand and model.
Check 5: The label size matches your labels
When the size in NotBot doesn't match the labels in your printer, labels come out cut off, very small, spread over two labels, or with a blank label between each one. Some printers refuse the label altogether.
Step 13: Check the Label Size box
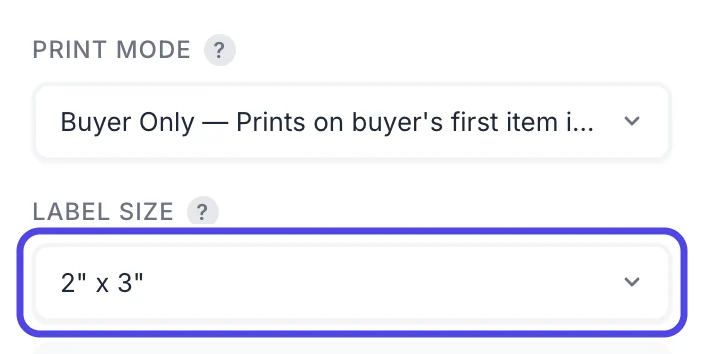
In the same Print Settings card, look at Label Size. It must match the labels on your roll. The size is printed on the box or the roll, for example 2" x 3".
To change it, click the box and pick your size. For help choosing, see Connect and test your printer.
Step 14: Print a test label
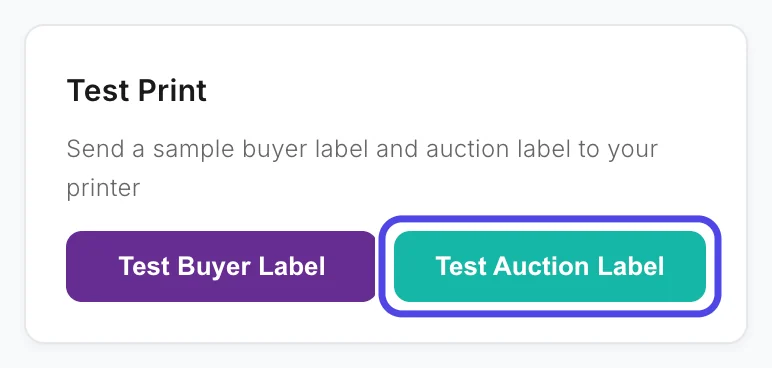
Scroll down the settings panel to the Test Print card and click Test Auction Label.
In the Buyer Only and Every Item + Buyer print modes there is also a Test Buyer Label button. Either one tells you if the printer and the size are right.
Step 15: Check the test label
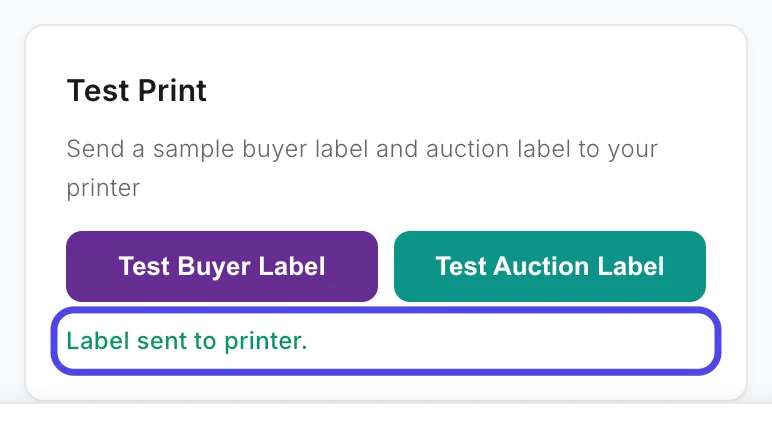
After a few seconds the card says Label sent to printer. and a sample label comes out.
- The label looks right: the printer and size are fine. Go on to Check 6.
- The label is cut off, tiny, or runs onto a second label: change Label Size and test again.
- Nothing came out: go back to Check 2 and Check 4. If it still won't print, follow Connect and test your printer.
Check 6: Preview mode is off
Preview mode is for trying out label designs. While it is on, each label opens on your screen as a PDF file instead of going to the printer.
Step 16: Click Done, then Customize
Click Done at the bottom of the settings panel to close it. Then, in the purple bar at the very top of NotBot, click Customize.

Step 17: Open Printers & routing
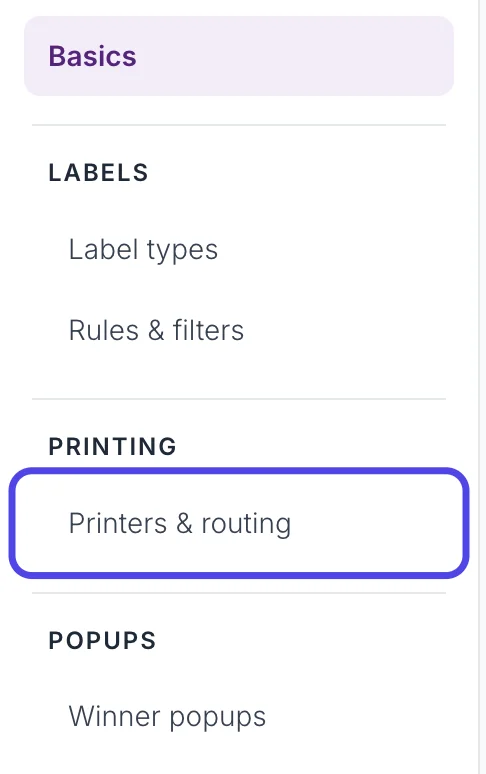
Near the top left, click Advanced Settings. Then, in the list on the left, under PRINTING, click Printers & routing.
Step 18: Turn off Preview mode
At the bottom of the page, find Preview mode. If its switch is purple, click it so it turns grey.
Click Dashboard at the top of the window to go back to your show. Any sales that came in while Preview mode was on can be printed by clicking their cards in Recent Labels.

Check 7: Buyer Only mode and repeat buyers
In the Buyer Only print mode, NotBot prints one label per buyer: on their first win of the show. When the same buyer wins again, no label prints. That is on purpose: the buyer already has a box with their number on it.
Step 19: Look for "Skipped, repeat buyer"
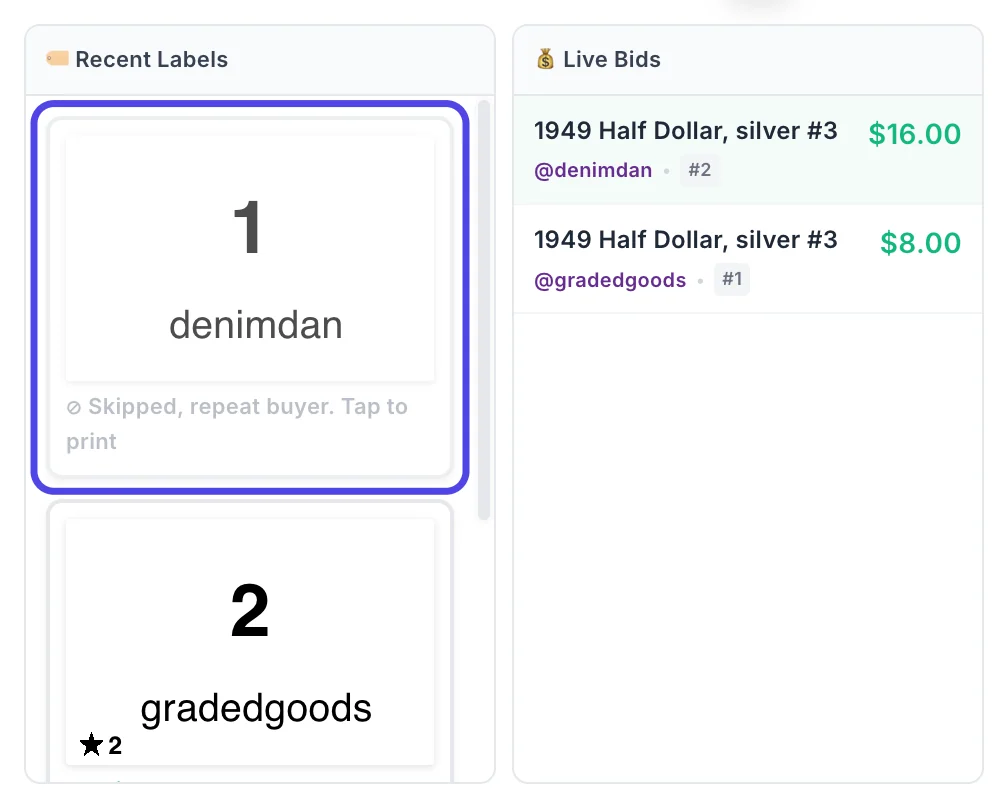
A faded card that says Skipped, repeat buyer. Tap to print is Buyer Only mode doing its job. Nothing is wrong.
- To print a label for this one sale anyway, click the card.
- To get a label for every sale, change Print Mode in Settings to Every Item or Every Item + Buyer. Choose which labels print explains each mode.
If something looks different
Labels come out blank
Thermal labels only print on one side. The roll is most likely in upside down. Scratch a label with your fingernail: the side that turns dark is the side that must face the print head. Turn the roll over, then print a test label.
Every sale prints two labels
Check whether NotBot is open with the same show on a second computer. Each copy of NotBot prints its own labels. Close the show on one of them. In Every Item + Buyer mode, a buyer's first win prints two labels on purpose: the buyer label and the item label.
Nothing prints for a while, then several labels come out at once
Some label printers go to sleep when they sit idle, and the first label only wakes them up. Look in your printer's manual for its sleep or auto power off setting and turn it off, or print a test label right before you go live.
Labels come out of the wrong printer
NotBot can send each kind of label (box labels, auction wins, Buy It Now, accepted offers, giveaways, payment failures, raids) to its own printer. Click Customize, then Advanced Settings, then Printers & routing, and look at Which labels print where. Set each row to Default unless you want that kind of label on a different printer. See Use two printers.
My printer is not in the Printer list
NotBot lists the printers your computer knows about. Install the driver from your printer maker's website, check that the printer appears in your computer's printer settings (Printers & Scanners on a Mac, Printers & scanners on Windows), click the round arrows button next to the Printer box, and restart NotBot if it still isn't there.
A sale is missing from Recent Labels completely
If the sale is in Auction History or Purchases but has no card, that kind of sale is turned off in Customize › Advanced Settings › Label types, or a Rules & filters rule skipped it. If it is in neither place, NotBot never received that sale, usually because the show connection dropped for a moment. See When the show connection drops and Add a sale NotBot missed.