Step-by-Step Guides
Connect and test your printer
Choose your label printer in NotBot, set the label size, print a test label, read the printer status, and fix labels that come out sideways or the wrong size.
Last updated 2026-10-08 · Applies to NotBot 1.4.4+ · Identical to the stable docs
NotBot prints to the label printer you choose in its Settings, at the label size you tell it. This guide picks the printer, sets the label size to match your labels, prints a test label, and shows how to tell at a glance during a show whether the printer is ready. If a test label comes out sideways or the wrong size, the last part shows the two printer settings that fix it. Do this once when you set up, and again whenever you change printers or label rolls.
Before you start
- You are signed in to NotBot. If not, follow Sign in to NotBot first.
- The printer is plugged into this computer with its USB cable and turned on. USB is the most reliable connection for a live show.
- The printer's own driver is installed, downloaded from the printer maker's website. Do this on a Mac as well as on Windows: the driver that comes with the computer usually shows the printer but prints blank, cut off, or nothing at all.
- The printer shows up in your computer's own printer list. On a Mac, open System Settings (called System Preferences on older Macs), then Printers & Scanners. On Windows 11, open Settings, then Bluetooth & devices, then Printers & scanners. On Windows 10, open Settings, then Devices, then Printers & scanners.
- A roll of labels is loaded.
Choose your printer
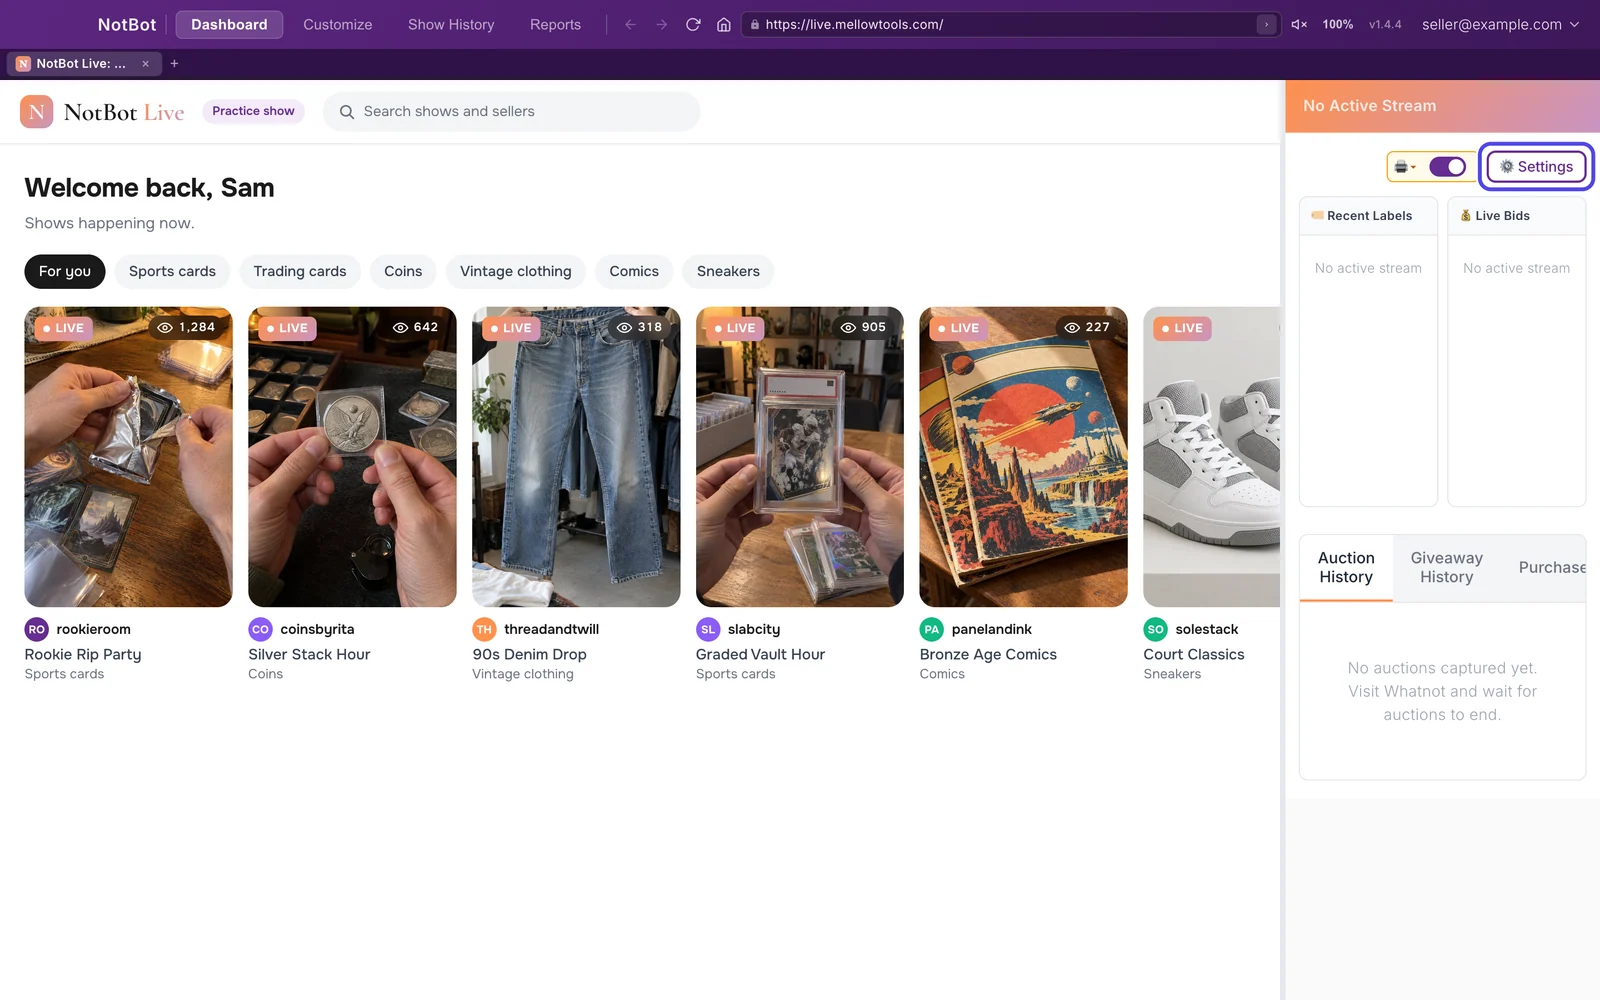
Step 1: Click Settings
In the NotBot panel on the right side of the window, click Settings at the top. It has a small gear in front of the word.
Next to it is a small printer icon with a switch. While no printer is chosen, that box has an orange border. Clicking the printer icon also opens Settings.
The pictures in this guide show our practice show site on the left side of the window. The NotBot panel on the right is the same whatever show you have open.
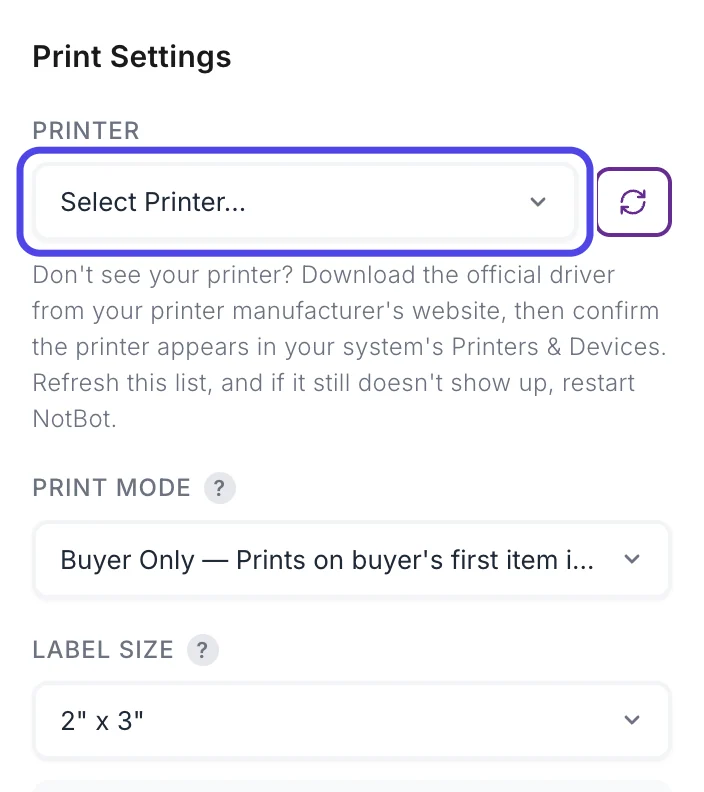
Step 2: Click the Printer box
The Settings panel slides in from the right and opens on the Settings tab. The first card is Print Settings.
Click the box under PRINTER. Until you choose a printer it says Select Printer....
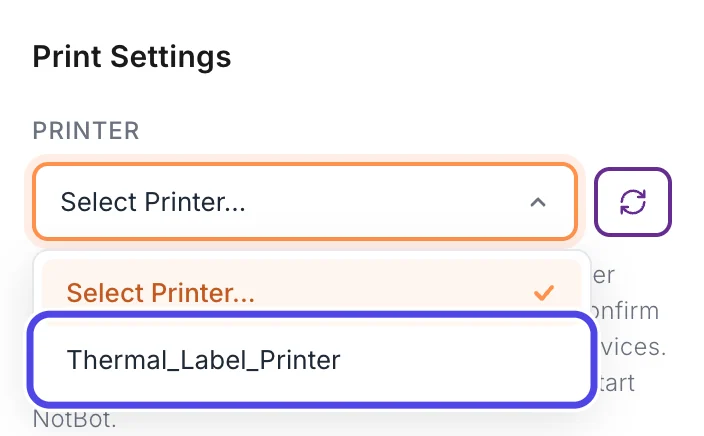
Step 3: Click your printer's name
A list opens with every printer your computer knows about. Click your label printer. Its name is usually the brand and model; in these pictures it is called Thermal_Label_Printer.
If your label printer is not in the list, click the round arrows button to the right of the box (it refreshes the list). If it is still missing, see My printer is not in the list at the end of this guide.
Set the label size
NotBot draws each label to fit one size of sticker. If the size in NotBot does not match the labels in your printer, labels come out too small, cut off, or spread over two stickers.
Step 4: Read the size on your labels
Look at the box your labels came in, or at the side or the core of the roll. The size is printed there in inches, for example 2" x 3" or 4" x 6". If you only have the labels, measure one with a ruler.
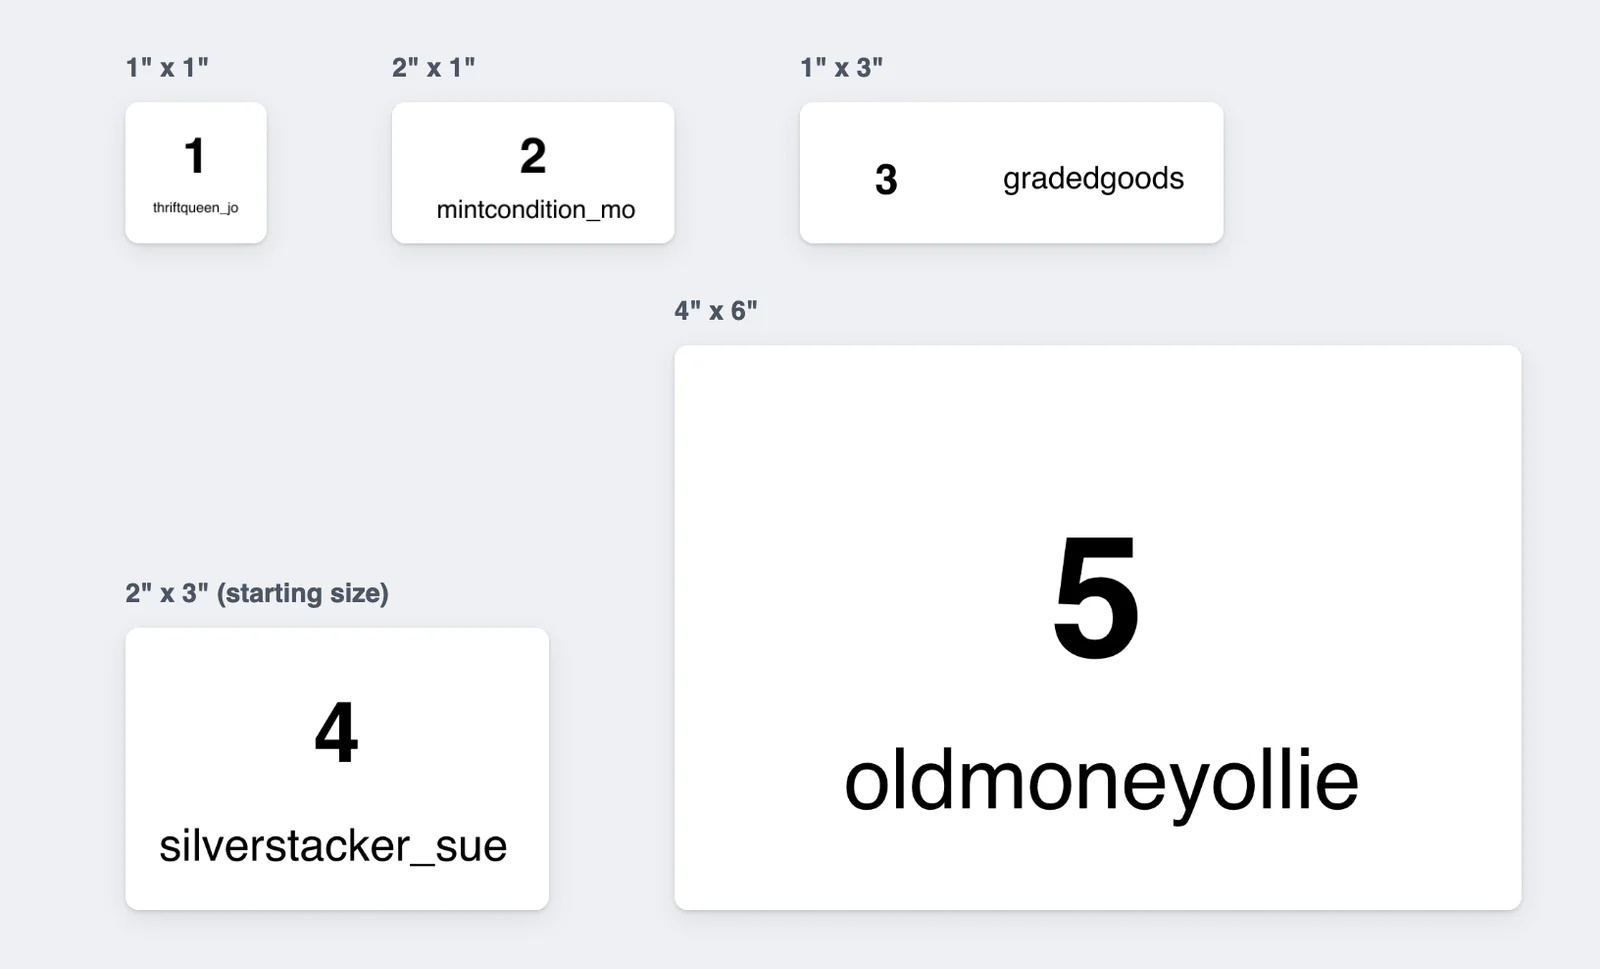
NotBot offers five sizes. The picture shows a buyer label printed at each size during a practice show, drawn to scale:
| Size in NotBot | Good for |
|---|---|
| 1" x 1" | A tiny square sticker with the buyer number. |
| 2" x 1" | Small buyer number labels: the number and username. |
| 1" x 3" | A long, narrow strip. The number and username sit side by side. |
| 2" x 3" | The most common size and the one NotBot starts with. Fits the number, username, item name and sale type. |
| 4" x 6" | Shipping label size. Big print and plenty of room for long item names. |
A label size written as 3" x 2" is the same as 2" x 3". Choose the size in NotBot that has the same two numbers as your labels. NotBot prints only these five sizes.
Step 5: Click the box under Label Size
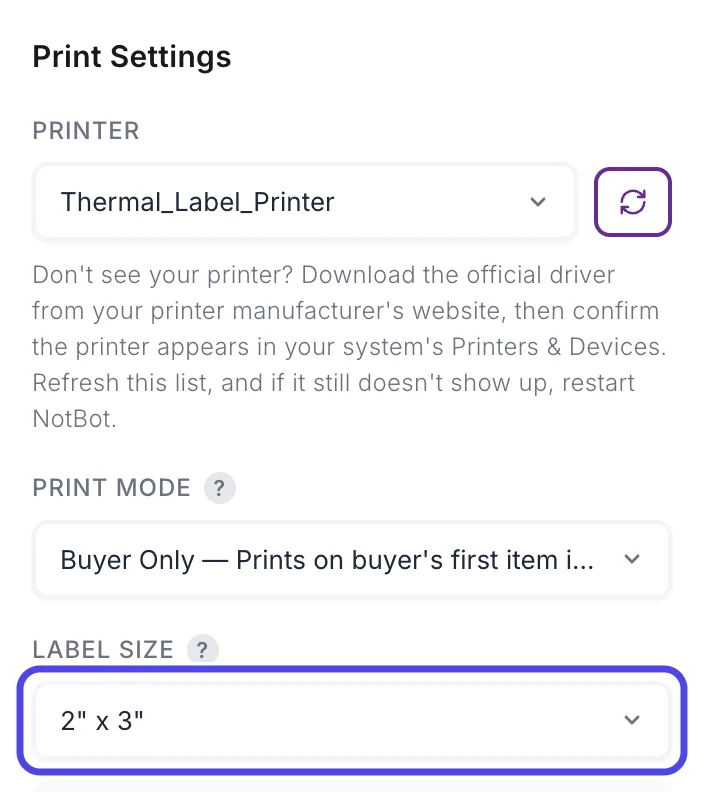
Back in the Settings panel, the Printer box now shows your printer's name. Two boxes further down, click the box under LABEL SIZE. It shows the size NotBot uses now. A new NotBot starts on 2" x 3".
Step 6: Click your size
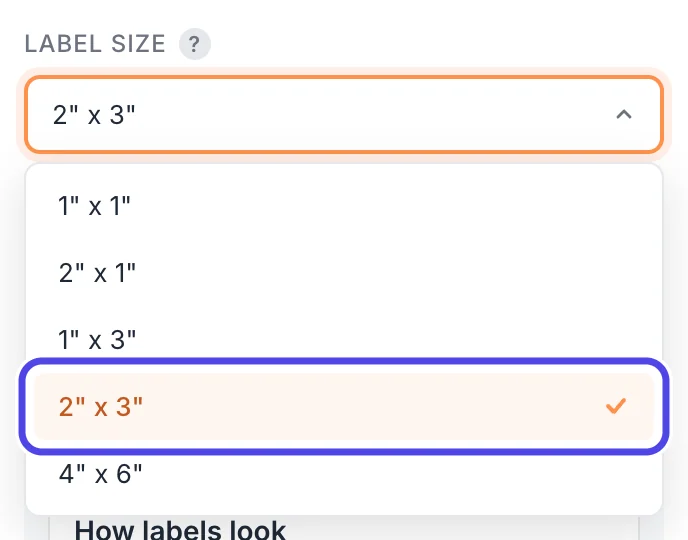
The list of the five sizes opens, with a check mark next to the size in use. Click the size that matches your labels. The list closes and NotBot saves it right away; there is no Save button.
The labels in these pictures are 2" x 3", so we click 2" x 3".
Step 7: Check the label previews
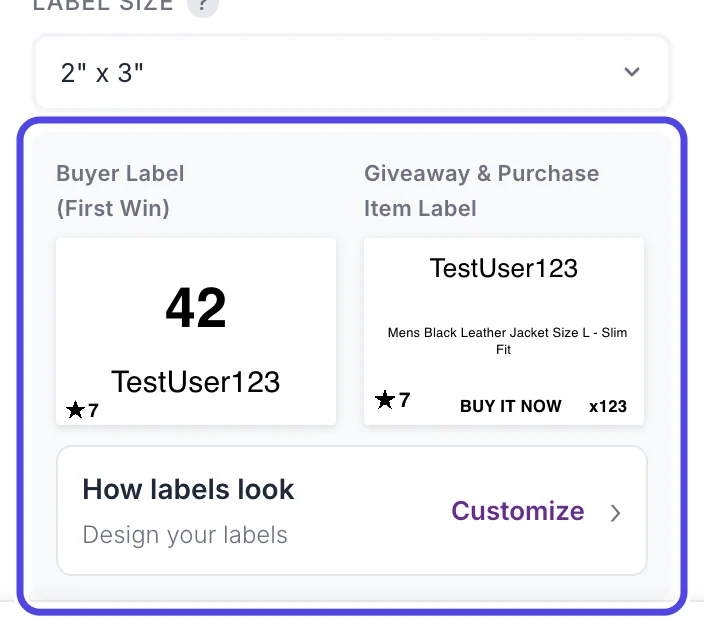
The small label pictures under LABEL SIZE show your labels at the size you picked, filled in with a pretend buyer called TestUser123. With Buyer Only, the print mode NotBot starts with, you see the Buyer Label and the item label that giveaways and Buy It Now sales print.
To change what is on a label, click How labels look under the pictures. It opens Customize, where you pick or edit your label designs: see Change which design a label uses.
Print a test label
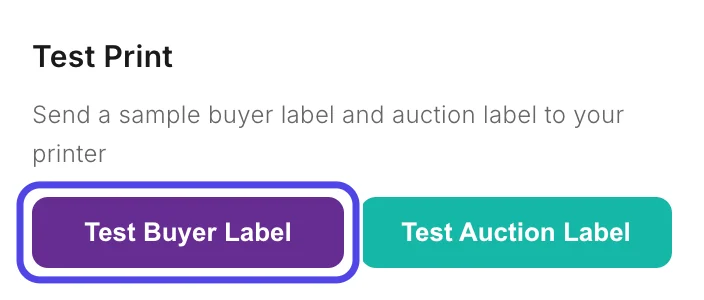
Step 8: Click Test Buyer Label
Scroll down the Settings panel to the Test Print card at the bottom.
Click Test Buyer Label. NotBot sends one sample label to your printer. Both buttons look faded until the printer answers, which can take up to about 20 seconds.
Test Auction Label, the button next to it, prints a sample item label instead. Which buttons you see depends on your print mode: with Every Item there is only Test Auction Label.
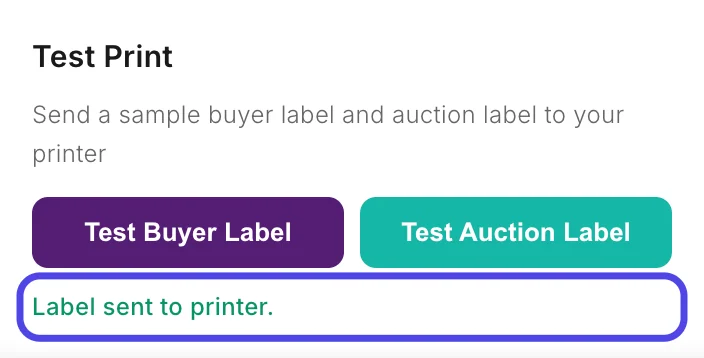
Step 9: Wait for "Label sent to printer."
When the printer has taken the label, green words appear under the buttons: Label sent to printer.
If you see gray words, Still processing, the printer has not answered yet. Look at the printer: the label may still come out. Red words mean the label did not print, and they say why. See the troubleshooting section at the end of this guide.
Step 10: Check the label that came out
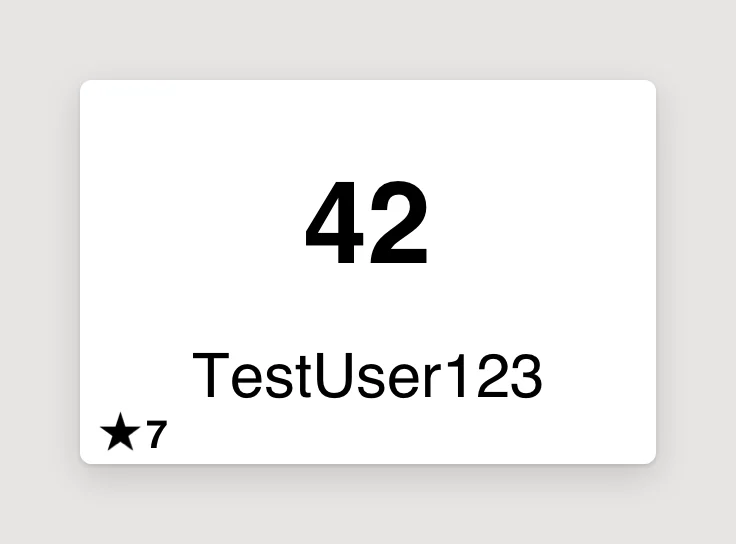
Pick up the label that came out of your printer. With 2" x 3" labels, the test buyer label looks like this: the buyer number 42 in large print, the pretend username TestUser123 under it, and a small star with the number 7 in the bottom left corner. During a show the star marks a buyer the marketplace flags as a first-time buyer, and the number counts the show's first-time buyers (7 means the seventh). A test label always shows the star so you can check where it prints.
Check three things:
- The whole label is on one sticker, and nothing is cut off at the edges.
- It reads the right way up and is not turned sideways.
- The print is dark and sharp, not faded or blank.
If all three are right, your printer is ready. If not, go to Fix a label that is sideways or the wrong size below.
Check the printer status
NotBot checks your printer every 15 seconds. The small printer icon at the top of the NotBot panel tells you, even in the middle of a show, whether the printer is ready.
Step 11: Click Done
Click the purple Done button at the bottom of the Settings panel. The panel closes. NotBot saves your choices as you make them, so there is nothing else to save.
Step 12: Click the printer icon
Look at the small box at the top of the NotBot panel, to the left of Settings. It holds a printer icon and a switch.
- The auto-print switch turns automatic printing on and off. When it is purple, labels print on their own during a show.
- The border of the box shows the printer status. Green means the printer is ready and automatic printing is on. Gray means the printer is ready but automatic printing is off. Orange means no printer is chosen, or the printer needs attention. Red, and gently pulsing, means the printer is offline.
Click the printer icon (circled) to see the details.

Step 13: Read the printer status card
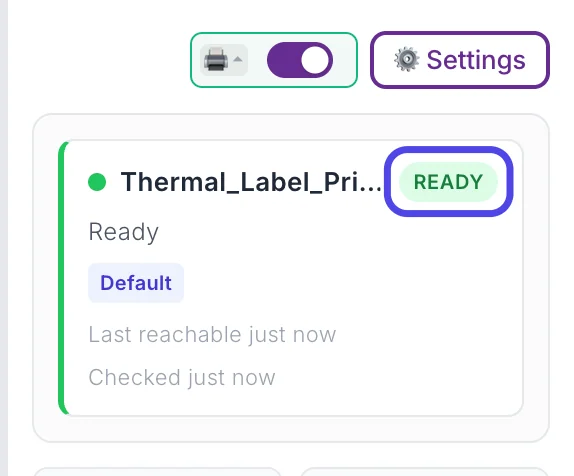
A card opens under the icon with your printer's name and its status on the right:
- READY (green): the printer is connected and ready to print.
- WARNING (yellow): the printer needs attention, for example it is paused or still connecting. The line under the name says what is wrong.
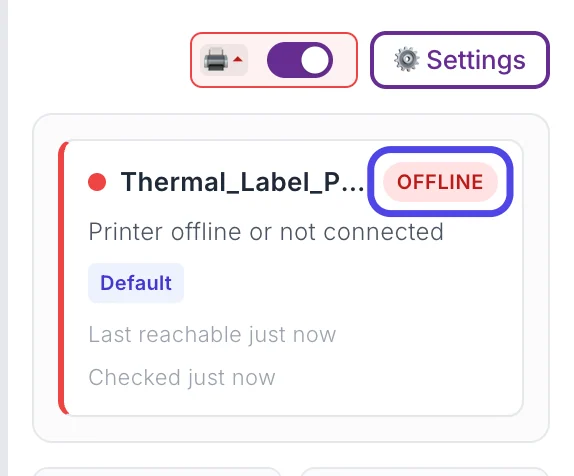
- OFFLINE (red): the printer is off, unplugged, or not answering.
- UNKNOWN (gray): NotBot could not check the printer yet.
The tag under it says what the printer is used for. Default means your labels go to this printer. If you send buyer labels to a second printer (in Customize › Advanced Settings › Printers & routing), that printer gets its own card with the tag Buyer labels. At the bottom, Last reachable says when NotBot last reached the printer, and Checked says when it last looked.
On Windows the card is called Print service and shows one status for printing as a whole, with a note that each printer's own status is not available on Windows yet.
Click the printer icon again to close the card.
Step 14: If the card says OFFLINE, check the printer
When the printer goes offline, the box around the printer icon turns red and pulses, and a message appears for a moment: Printer, your printer's name, offline, and the reason. The card says OFFLINE and Printer offline or not connected.
Check that the printer is turned on, that both ends of the USB cable are pushed in firmly, and that the printer is not showing an error light. You do not need to restart NotBot. Within about 15 seconds of the printer coming back, the card changes to READY and a message says the printer reconnected.
To check again right away, click the printer icon to close the card, then click it again. NotBot checks the printer each time the card opens.
On Windows the card is called Print service. There, OFFLINE with Printer service not running means NotBot's own printing helper on this computer has stopped, not the printer. Close NotBot completely and open it again.
Fix a label that is sideways or the wrong size
Only follow these steps if your test label came out turned sideways, upside down, cut off, tiny in one corner, or spread over two labels. First check that Label Size matches your labels. If it does, two printer settings in Customize › Advanced Settings › Printers & routing tell NotBot how your printer feeds labels and which roll is loaded.
Step 15: Click Customize
In the purple bar at the top of the NotBot window, click Customize.

Step 16: Click Advanced Settings
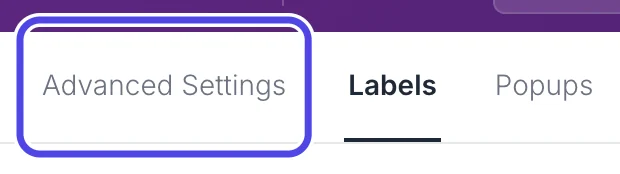
Customize opens full screen. Along its top are three tabs: Advanced Settings, Labels and Popups. Click Advanced Settings.
Step 17: Click Printers & routing
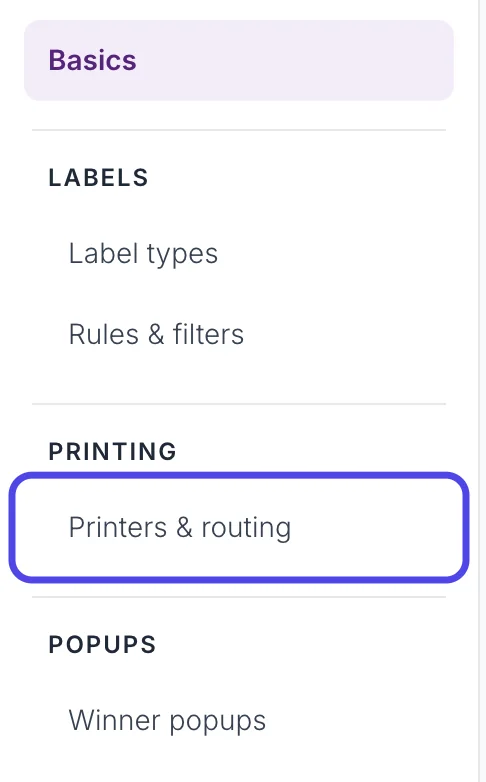
Advanced Settings lists its pages down the left side. Under Printing, click Printers & routing.
Step 18: Change Feed direction if the label is sideways
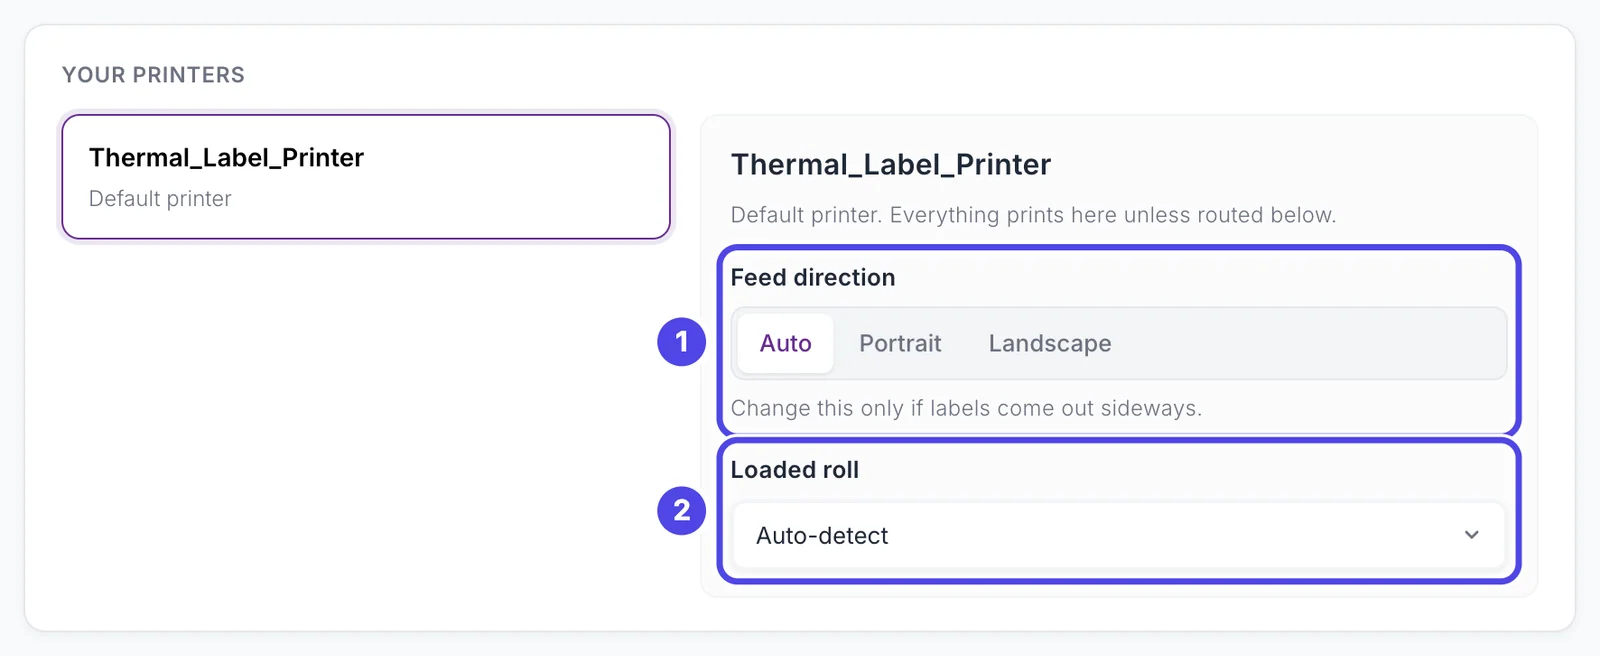
The Your printers card lists your printers on the left. Click your printer there if it is not already selected. Its settings show on the right:
- Feed direction has three buttons: Auto, Portrait and Landscape. The highlighted one is in use. It starts on Auto.
- Loaded roll tells the printer which label roll is loaded. It starts on Auto-detect.
Printers feed labels in one of two ways. Landscape printers pull the label in long side first; Rollo and Munbyn printers work this way. Portrait printers pull it in short side first; DYMO and Brother printers work this way. Auto uses Landscape for every size, except 4" x 6" labels on a Mac, which use Portrait, the way shipping label rolls usually feed.
If your test label came out sideways or cut off, click Portrait (or Landscape if you use 4" x 6" labels on a Mac, where Auto already means Portrait). The change is saved right away, and only for this printer.
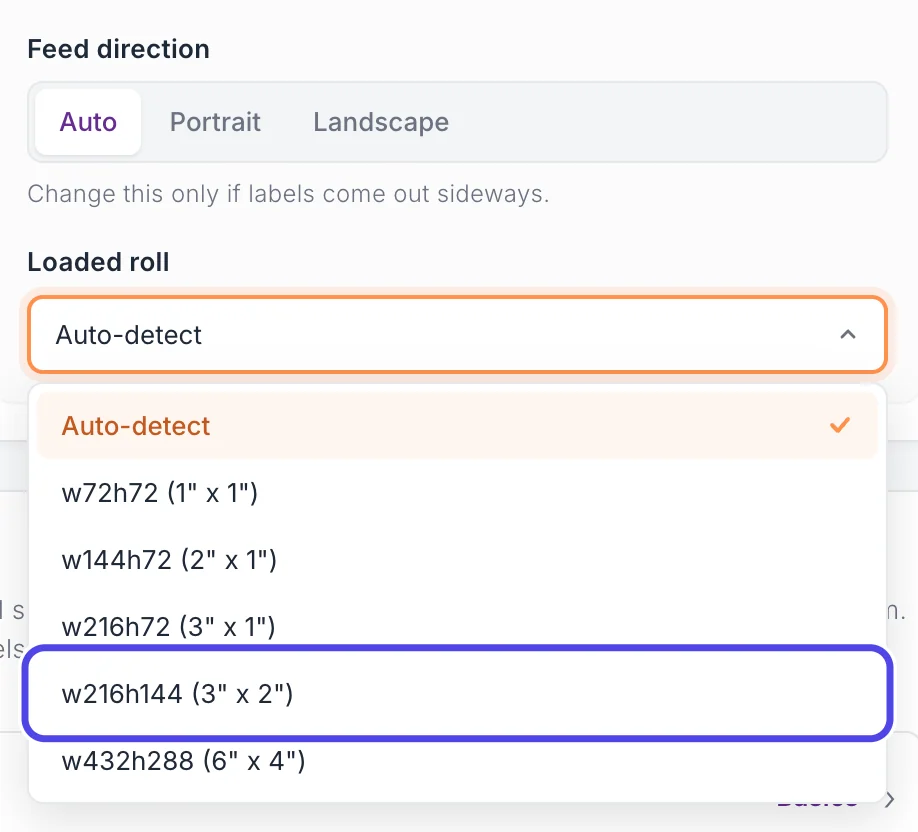
Step 19: Pick your roll in Loaded roll if the size is still wrong
If your labels still come out cut off, squeezed, or spread over two labels, click the Loaded roll box. It lists the label sizes your printer's driver knows about, each with its size in inches.
Click the one that matches your labels. The width and height can be listed the other way round from the box, so 3" x 2" is the same roll as a 2" x 3" label. Your printer may use different names than the ones in this picture. To undo it, choose Auto-detect again.
If the list only says Auto-detect, your printer's driver did not report any sizes; install the driver from the printer maker's website.
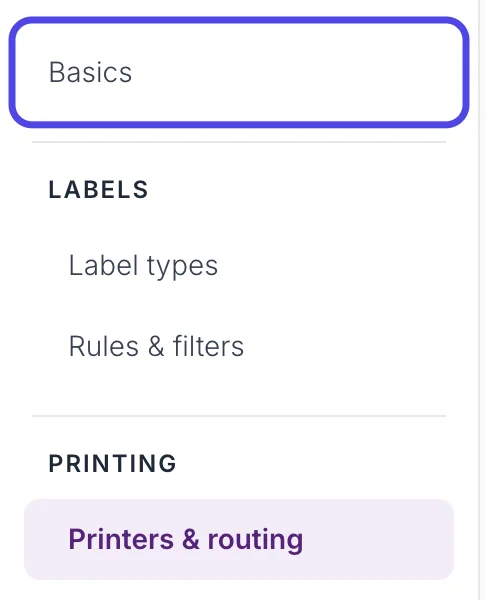
Step 20: Click Basics
Print another test label to check the change. At the top of the list of pages on the left, click Basics.
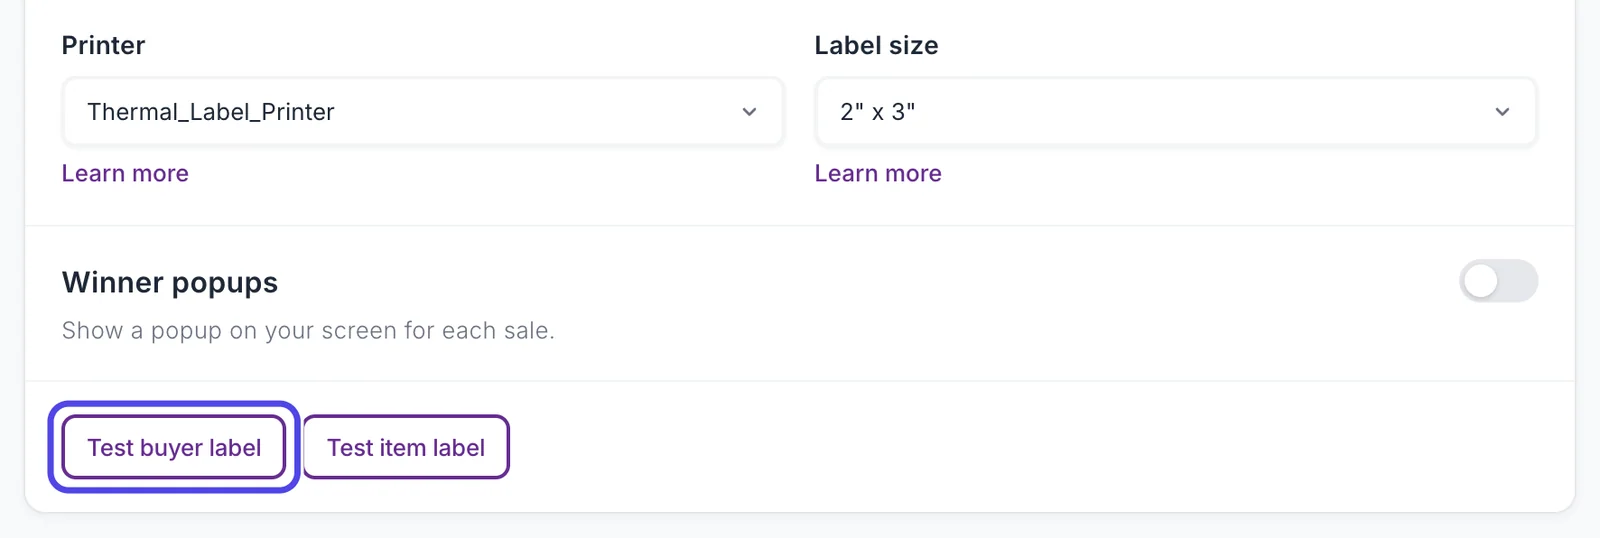
Step 21: Click Test buyer label
Basics has the same everyday settings as the Settings panel: print mode, Printer and Label size. At the bottom of the card, click Test buyer label. NotBot prints the same sample label as before, and says Label sent to printer. next to the buttons.
Keep switching between Portrait and Landscape on Printers & routing, with a test label after each change, until the label comes out the right way.
Use a different size for some labels
Most sellers use one size for everything. If you keep two label sizes, for example small labels for boxes and bigger ones for items, you can give each kind of label its own size.
Step 22: Pick a size in the Size column
On Printers & routing, scroll down to Which labels print where. It has one row for each kind of label: Box labels (buyer), Auction win, Buy It Now, Accepted offer, Giveaway win, Payment failed and Raid.
Click the Size box on a row and pick a size. That kind of label then prints at that size. Default (2" x 3") means the row follows your Label Size in Settings. The Printer box on the same row can send that kind of label to a second printer.

If something looks different
My printer is not in the list
Check that the printer is turned on and plugged in with its USB cable, then click the round arrows button next to the Printer box. If it is still missing, install the driver from the printer maker's website (on a Mac as well as on Windows) and check that the printer appears in your computer's own printer list. Then close NotBot completely and open it again, so it picks up the new printer.
The test label printed blank, faded, or as random marks
This almost always means the computer is using its own built-in driver instead of the printer maker's driver. Install the driver from the printer maker's website, choose the printer again in NotBot, and print another test label. Thermal labels only print on one side, so also check that the roll is not loaded upside down.
I see red words under the Test Print buttons
The label did not print, and the red words say why. Check that your printer is chosen in the Printer box, then turn the printer off and on, check the cable, and try again. Labels are not printing: step-by-step fixes covers each message.
It says "Label sent to printer." but nothing came out
NotBot handed the label to your computer, but the printer did not print it. Look at the printer status card (click the printer icon). If it says OFFLINE, check power and the cable. If it says READY, pick your roll in Loaded roll on Printers & routing and make sure the printer maker's driver is installed.
The label prints sideways
Change Feed direction on Customize › Advanced Settings › Printers & routing. Try Portrait, print a test label, then try Landscape and print another. Keep the one that prints the right way. On a Mac, Auto already uses Portrait for 4" x 6" labels and Landscape for every other size.
The text is tiny and squeezed into one corner of the label
The label size in NotBot is smaller than the labels in your printer. Check the size on your roll and choose the same size under Label Size in Settings.
The label is cut off or printed across two labels
The label size in NotBot is bigger than your labels, or the feed direction is wrong. Check Label Size in Settings first, then try the other Feed direction, then pick your roll in Loaded roll.
A blank label comes out after every printed label
The printer is set up for a different paper size than your labels. Pick your roll in Loaded roll on Printers & routing, and run your printer's label calibration as its maker describes. If it still happens, follow Labels are not printing: step-by-step fixes.
My labels are 3" x 2", but NotBot only offers 2" x 3"
They are the same size. NotBot lists each size once, so choose 2" x 3".
My labels are a size NotBot doesn't list
NotBot prints only the five sizes shown in this guide. Labels of any other size can come out cut off or with empty space, so use labels in one of these five sizes.
The box around the printer icon is orange
Either no printer is chosen (click the printer icon: it opens Settings with the Printer box highlighted) or the printer needs attention (click the icon and read the line under the printer name on the card).